 Greetings to all Animesuki forumers !!!!!
I. Introduction
Greetings to all Animesuki forumers !!!!!
I. Introduction
I'm now starting a thread for my sig, avatar etc. artworks here. As you can see, i'm a complete amateur when it comes to image manipulation so you cannot expect much from me

.
But still i will try my best to make it beautiful and bring out emotions especially my ideals from my creations
. From time to time i will update this page.
If somehow you've to like some my works feel free to contact me, im willing to share my works with everyone and i'm open for comments and criticisms.
(***)
In the event that some of my artwork has offended anyone again feel free to contact me again, ***
However this i warn you ppl.
some works i'm planning might be and will be a little bit extreme. As long as i don't break
the rules of the forum and i feel that my art is still within it's bounds, i will seriously defend it's existence (hopefully it would't come to this).
(date started: August 2, 2008)
-----------------------------------------------------------------------------------
Pretty much of everything here is a
freebie unless
me or
someone else is already using them
. and i would appreciate it if you inform me first before using them.
II. Avatars
Sekidousai @Inukami
 Little Goodbye
 @Zegapain (This is my favourite avatar for now)
 Sheryl Nome
 @Macross Frontier
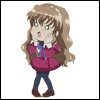
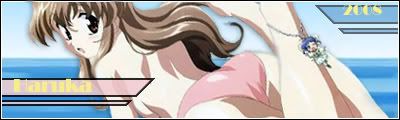
 Ranka
Ranka @Macross Frontier
 Bobby
Bobby @Macross Frontier
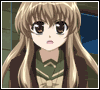
 Haruka 22 frames
 Haruka semi static
 Urusai
 @Nogizaka Haruka no Himitsu
 Haruka Attack! Pantsu!

 Haruka Blink
(no this one is not a copy and paste; i used my own timing here and a unique blink
)
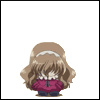
 Chibi H.


 III. Signatures
Macho
III. Signatures
Macho (^^) @Inukami
 Misaki Shizuno
 | Yehl | iAL (ieru?) @Zegapain
 Ryoko Kaminagi
 @Zegapain
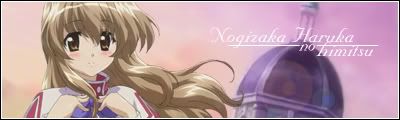
 Haruka
 Rev.
2.1 @Nogizaka Haruka no Himitsu
 Majou shoujo
 @Nogizaka Haruka no Himitsu

Haruka Sefuku ^^ (freebie of the week)
1piece
HikaruxMisa @Macross - Super Dimensional Fortress

__________________________________________________ __________________________________________
IV. Miscelleaneous stuff
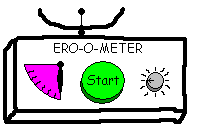
Ero-o-Meter™ ***created by mangalowres upon my request
 Parody etc.
__________________________________________________ _________________________________________
V. Sekidousai's Quick'n dirty™ guides
This is my guides section. I have compiled all of my
Quick'n dirty™ guides here so that it will be easy to find
.
History: I really wasn't planning on making any guides. It all started with mangalowres' Moe-Meter™ , He said he has trouble adding some transparency to it so then i decided to help him out and added transparency myself. After i posted his modified moe-meter i then i asked if he could make me an Ero-Meter™. And so he did but the problem again is that the sides aren't transparent, and so i made a Quick'n dirty™ guide to show him how to solve his problem ;p and also i have nothing better to do other than posting nonsense in AS forums.
Quick'n dirty™ Guide to Opening multiple Raw Images and Cropping
Software Used is Ulead GIF animator 5 free
Spoiler for Opening multiple Raw Images and Cropping combo guide:
Opening multiple Raw Images and Cropping combo guide
 Step.1)
 Startup Ulead GIF animator, You can either use the Startup Wizard or the Main Menu bar
--------------------------------------------------------------------------------------------
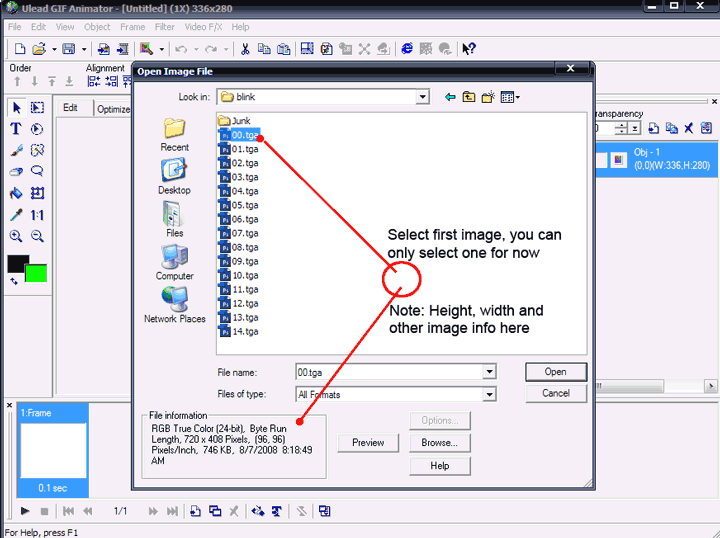 Step 2a.)
 Select your first
raw image, This will determine the overall size of the Project.
(*Note: I used
.TGA files but still you can use
.jpg, .gif, .bmp etc. as long as ulead can read it.)
---------------------------------------------------------------------------------------------
 Step 2b.)
 The sad thing i found about Ulead is that it can only open an 1 image at a time, we can still add the rest later
---------------------------------------------------------------------------------------------
 Step 3.)
 We will now add the rest of the raw images. Click on add Images and a new window should pop-up
-------------------------------------------------------------------------------------------------
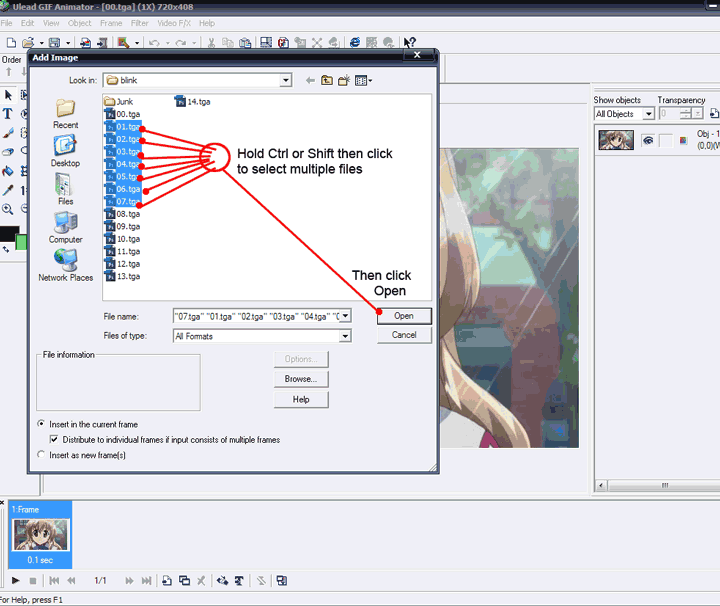 Step 4a.)
 Hold the "
Ctrl or
Shift" key and then select the rest of your raw images. Then click on Open.
--------------------------------------------------------------------------------------------------
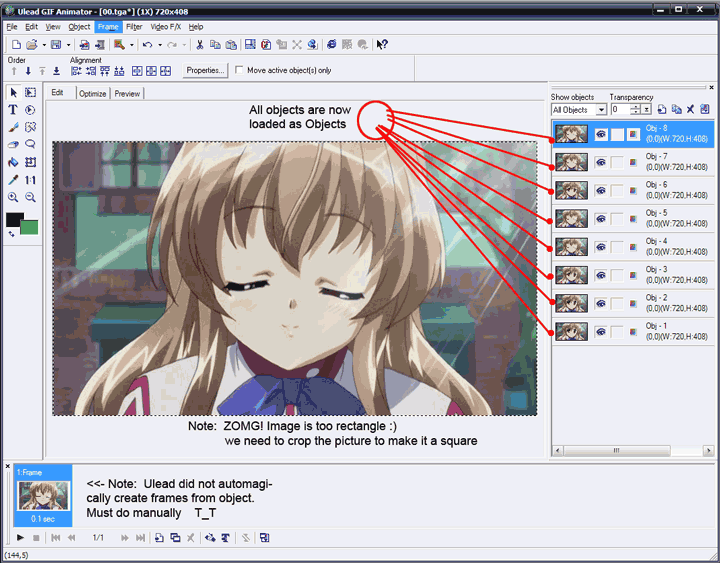
Step 4b.) Now that all of the images are loaded everything should be ready...
not!!!")
As you can can see Ulead GIF animator did not create frames for the objects that we have loaded and also the Project has
a Rectangular Aspect Ratio (widescreen/16:9) so the next thing we need to do is
cropping.
--------------------------------------------------------------------------------------------------
 Step 5.) Cropping
. Click on the Selection tool on the left side. Make sure
Equal height and width is checked so
that we can make a perfect square. Now make a square on an area that you would like to keep.
----------------------------------------------------------------------------------------------------
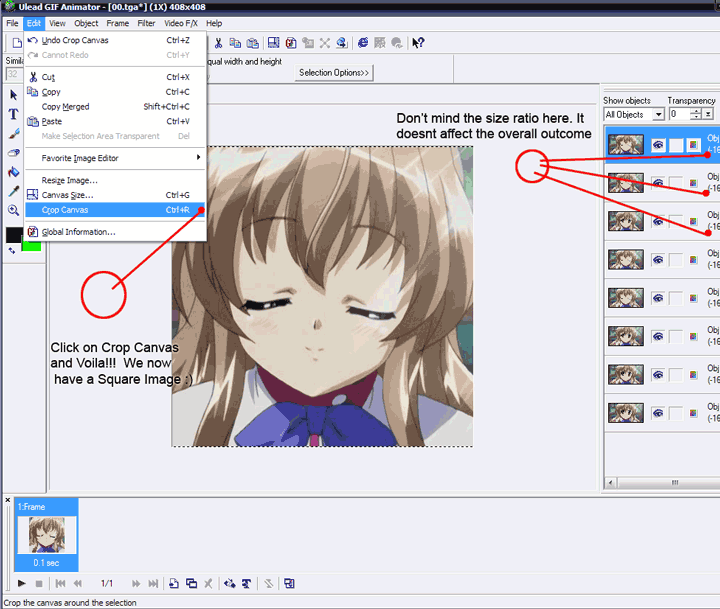 Step 6.)
 Now go to
Edit> and then click on
Crop Canvas and there!!!! a perfect sqare for an AS avatar
(Note: If you don't want to make a perfect square, You can uncheck
Equal height and width, or you can use Selection Tool - Eliptical to make a circle

.)
Part 2 shall be added soon^^;
-----------------------------------------------------------------------------------------------------
Quick'n dirty™ Guide to resizing and boardering
Software used is Ulead GIF animator 5 free
Spoiler for Resize and Boardering combo:
Resizing and Boardering Combo Guide
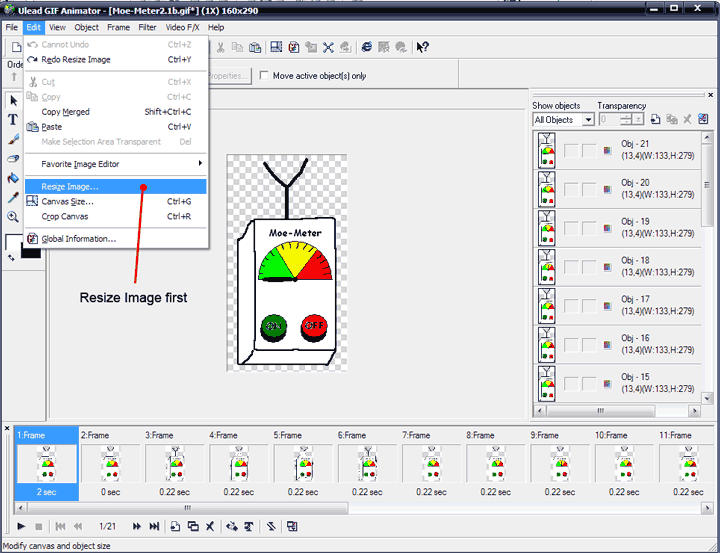 Step 1.)
 Click resize Image
-------------------------------------------------------------------------------------------------
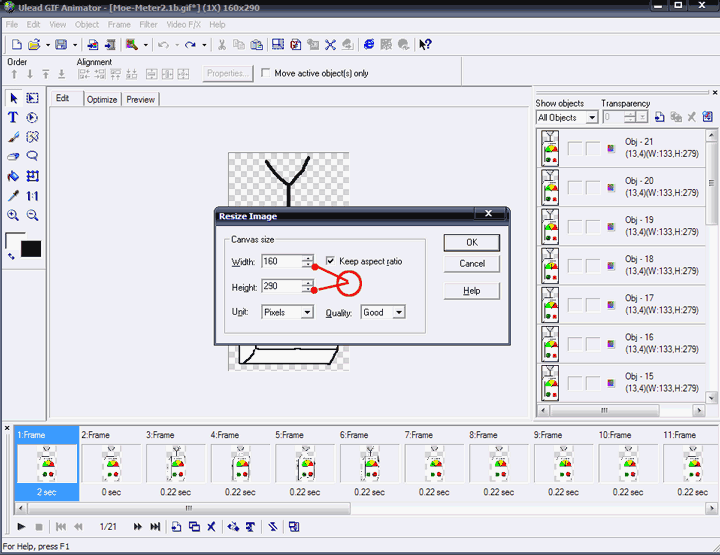 Step 2.)
 Enter prefferred image size then click
OK and VOILA!!! the whole project is resized

next is boarder4all
-------------------------------------------------------------------------------------------------
 Step 3.)
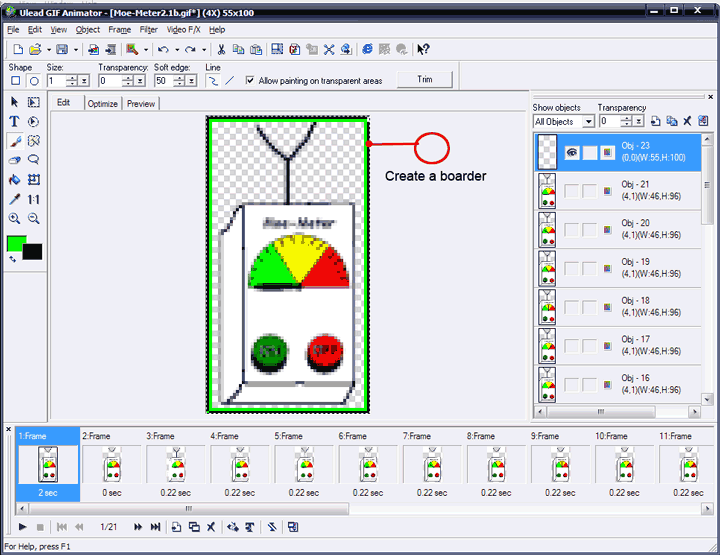
 Click on topmost object.
warning: If object is below, The border will be buried by the pictures on top of it.
-------------------------------------------------------------------------------------------------
 Step 4.)
 Insert a new blank Object. we will make our border on the new blank object.
-------------------------------------------------------------------------------------------------
 Step 5.)
 Draw a boarder
. I suggest you zoom the image first before drawing a border
-------------------------------------------------------------------------------------------------
 Step 6.)
 Click on the second or next frame. The boarder will be gone (don't panic its normal.)
-------------------------------------------------------------------------------------------------
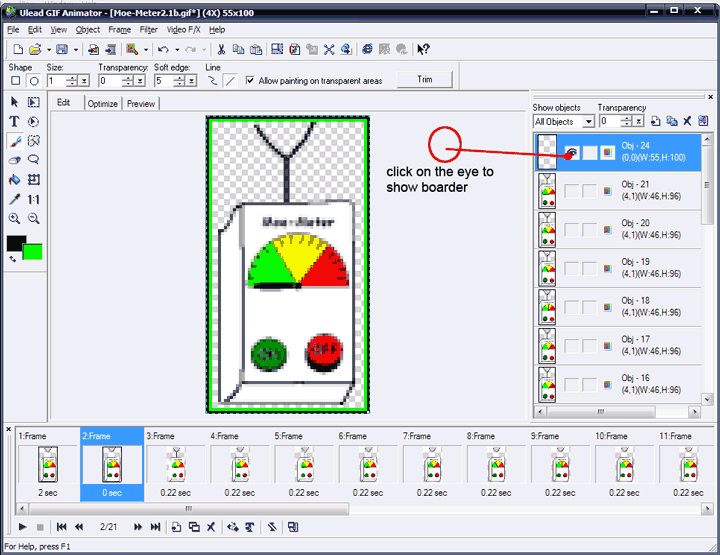 Step 7.)
 now press the eye on the object section and there you go
! Boarders!!!
~~~~~~repeat 6 and 7 until the whole project is covered with borders
-------------------------------------------------------------------------------------------------
Ok if anything is not clear again just let me know ^^
Quick'n dirty™ Guide to transparencies using the magic wand tool
Software used is Ulead GIF animator 5 free
Spoiler for Transparency:
Transparency Guide
 Step 1.)
 Open an existing .GIF animation.
----------------------------------------------------------------------------------------------------
 Step 2.)
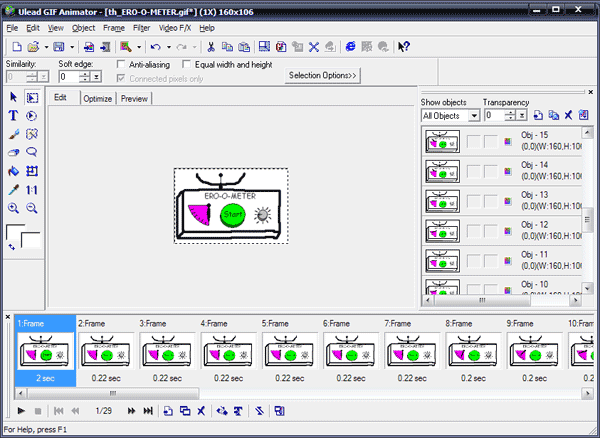
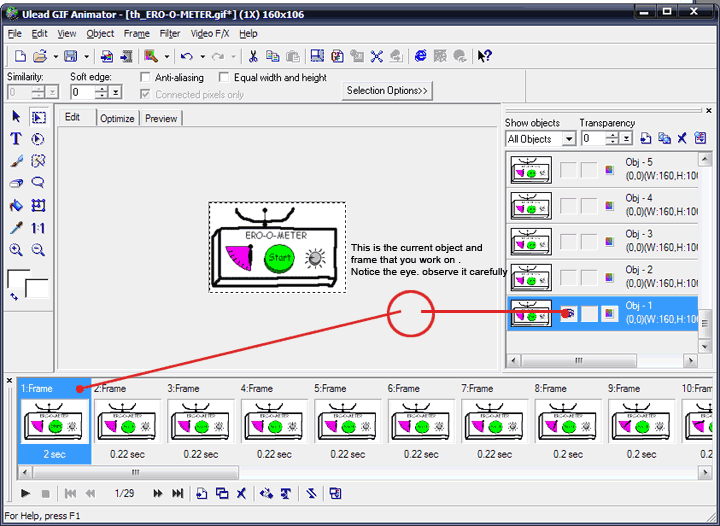
 Now we must select the object and frame that we want to work on. I suggest we begin by selecting the first
frame and
object.
(Observe the eye carefully on the objects section, it shows you the current object you will be making tranparent.)
---------------------------------------------------------------------------------------------------
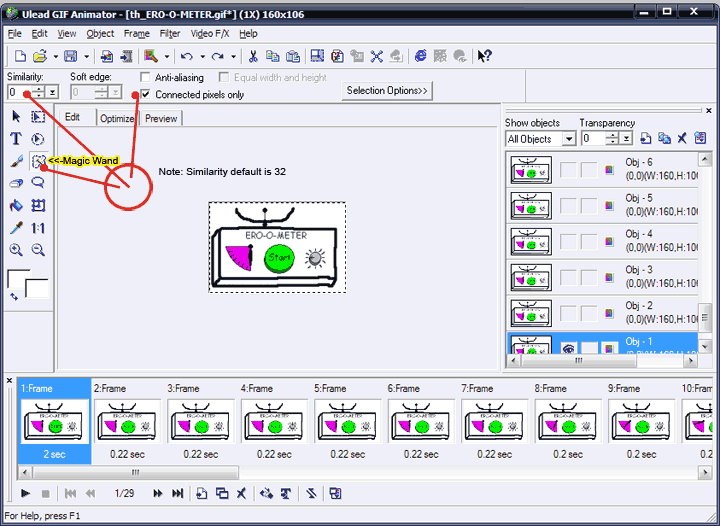 Step 3.)
 Select all of these, Make sure
Similarity is set to
0 and
connected pixels is
checked or else your magic wand will scatter all over.
----------------------------------------------------------------------------------------------------
 Step 4.)
 Use the Magic Wand to magically select a region that you want to make transparent.
----------------------------------------------------------------------------------------------------------
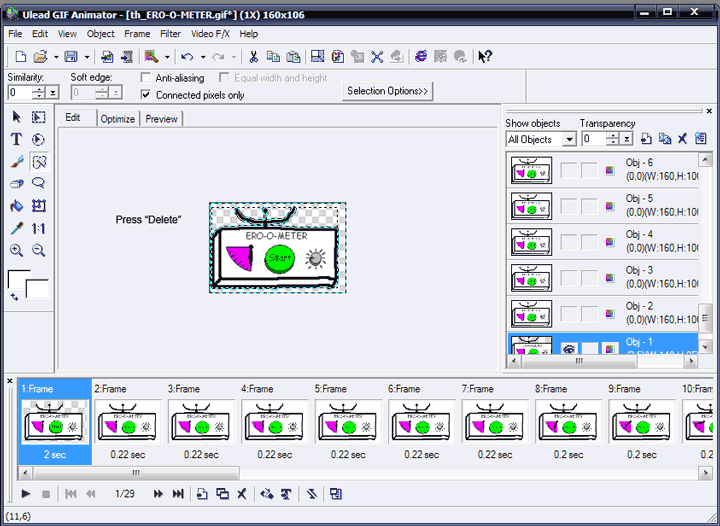 Step 5.)
 Press
Delete to remove the unwanted parts and there
! transparencies.
------------------------------------------------------------------------------------------------
 Step 6.)
 Select the next frame and object and repeat steps 4 & 5 if you still want to continue

******* You can also use the Eraser tool and Selection (rectangle/elipse) tool to make transparencies***********
---------------------------------------------------------------------------------------------------
\m/.