Briefing
What is...
This is a turorial on how to optimize the .gif file format.
Note: gif is read: jif
This tutorial the direct integrated settings in ImageReady & Photoshop. You can find techniques to optimize the resulting animation in other tutorials.
For example this Advanced Optimization Tutorial by Riker
In this tutorial we will start with something like this.
--------------------------------------------------------------------------
--------------------------------------------------------------------------
I've grouped some of the windows togheter for a better view, you should be able to recognize them.
If you don't then look at the image bellow and make sure you have the same selected.
--------------------------------------------------------------------------
--------------------------------------------------------------------------
Where should I Optimize my jifs
Hmm...
In practice most of the time it makes no diffrence.
Theoreticly ImageReady would be the best choise since you may delete things like frames, change timing, run the animation while still in optimize mode.
Note: If you're a begginer and have trouble with the above try ImageReady.
Starting-Off in ImageReady
Doing it in ImageReady...
Click on the
Optimize Tab in the pallet (window) from the right of the main image-window, and then on the
Optimized,
2-up or
4-up in the main-image-window.
You should have something like...
--------------------------------------------------------------------------
--------------------------------------------------------------------------
Notes
Bellow each image is listed the actual size of the resulting optimized version.
In the example these are 65.1k, 52.23k, 45.43k, not counting the original, which is the first one (left corner top).
Bellow that is the time it would take for it to load on a poor conection.
The "@" sing is read as "at" so for example "Cats@EmailAddres.com" is read as "Cats at EmailAddress.com" or "@ User" is read as "at User". Believe it or not some people actually don't know this 
Infreaquantly Asqued Questions
Q. Why is there a pallet in ImageReady.- To make it posible to optimize multiple parts of the image simultaniasly. This is used generally with slices where multiple images are generated from a single one optimized in diffrent ways.
Q. What's with Optimized , 2-up, 4-up- They simply indicate how many windows (actually versions) of the image are up. (as in "you see")
Why would you need it?!... Well let's say you've mingled with the settings somewhat, but aren't that satisfied and want to try out something diffrent. What you would do is select another one of those little images that way you can see if the new settings are better or worse by looking at the previous one. 
This about covers what you need to do in IR to get started move on to
The Settings title.
Starting-Off in Photoshop
Doing it in Photoshop...
It's quite simple. You go
File »
Save for web.... Then click the
4-up tab, preferably~
A dialog box resembling the Optimize Pallet in IR should appear.
Now just move on to the next title.
The Settings
In the Optimize Pallet...
Before you continue make sure you have format set to: GIF
Now how do we get a jif under 50Kb

Mmm...
Open all 4 drop downs: Color Table, Dither, Transprency, Options
Static Stuff
Just leave them like I say bellow.- Add Metadata: Off
This adds extra information, like author etc. As a concequence to the size.
- Interlaced: Off
This will make it so your image loads first as a low quality version taking up the space and then slowly as the actual thing. This just adds to the size.
- Transparency: On - Diffusion @ 100% & Matte None
Turning transparency off contrary to common sence will actually buff up the file size.
- Web Snap: 0%
Posible THE ULTIMATE LAST RESORT. Do not use it. Quality dies.
The Works
Down and Dirty business...
In the Optimize Pallet there are 4 points of intrest.
Do note that optimizing doesn't mean we intent to make the image smaller while sheeterizing quality.
- Reduction
There are two setting for this, that actually do something useful.
The first, my fav, is Perceptual this will produce small fall size.
The second, is Adaptive, this produces a larger file size, but it's keeps more quality.
Oh but what if you want to keep some little gradient somewhere. Let's face it all the setting here would totally screw with it. Well the solution is simple. You first make a selection of the incy little pieces you want to preserve (don't select too much) then you would save it. Now in your optimize pallet you would go to reduction, and click the little rectangle with square next to it. In the channels drop-down select you saved selection and click ok. Now whatever you had selected is excluded from optimization.
Bellow is a pic that show the position of this option for Reduction, Loosy & Color
----------------------------------------------------------------------------------------------------------------------------------------------------
- Lossy
This will optimize the file withouth loosing quality. Loseless compression sorta speak. Well that's a lil' white lie in the end you do loose quality.
Anyway, values from 1 to 10 are safe enough. You also have the rectangle-cyrcle thingy next to it, just like for Reduction.
- Colors
The formula is this:
More Colors = More Quality
Less Colors = Smaller FileSize
So we need to have the optimum amount of colors in our image.
The easy way out is to, in the Optimize Pallet, click the little triangle just bellow the X that closes it. Then select Optimize to File Size... now enter 50 and your color problems are over.
The hard way out, is to either manually enter new color numbers for the colors. Or click the little icon next to it to bring up the Color Table and manually delete colors. Please note that this is very "leetesh" to say the least and takes a great deal of understanding of how colors work in an image as well as just trial and error error error.
- Dither
Diffusion is the only sane Method for Dither, all other increase the filesize. The value ranges for Dither are as follows:
85% - 100% » insane filesize increase with no quality increase
51% - 84% » relative
0% - 50% » quality increase with almost no filesize increase
As you increase the value you'll notice that little dot's appear (just zoom in and see). These dots go from dark to light generally so at 100% they will cover all the colors while at lower values they might only cover the dark tones in the image.
Other Optimizing Notes
Answers, Tips & Tricks
Q. When can I optimize it to 50k?
- If when you enter optimize mode with the settings maxed out the filesize is over 100 ~ 110kb, don't bother, optimizing things like that is going into the ugly zone.
Complexity Charts for Optimizing Animations.
-------------------------
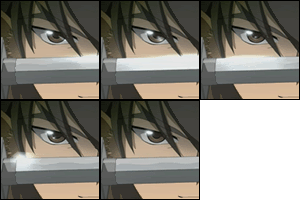
Complexity Level : A
Description : Avatars of a simple scenes, like a character blinking or some simple expression or movement.
Example : Black kitty drinking milk.
Result : High Quality 100% of the time.
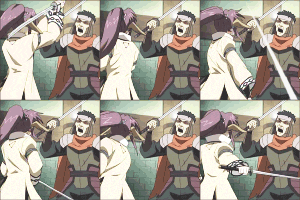
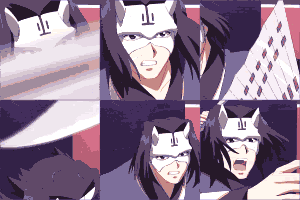
Complexity Level : S
Description : Avatars with a little more complexity, character moving more in them or a scene camera change, colors moving on the screen.
Example : Scene with black kitty drinking milk and a bottle next to the kitty.. bottle braking in next scene due to gunshot. *scene change to a static of a catgirl*
Result : Medium to High Quality, minor quality loss sometimes.
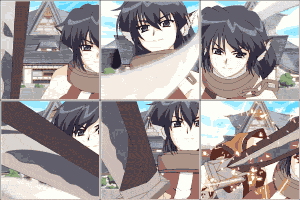
Complexity Level : SS
Description : Long battle scenes, characters and objects flying around, generally long 'unstable' sequences with tons of movement..
Example : Black kitty running and dodging bullets with tons of objects breaking left and right.
Result : Low to Medium Quality MAX. Scene-chop is to be expected, 100x100 Square is out of the question. 50/50 success rate in general.
For Animated Sigs the complexity level goes down 1.5 levels compared to Avatars (meaning SS is impossible with currently allowed file formats) for the big ones. Higher complexity levels become possible by decreasing size closer to avatar level.
S and SS classa take lots of time and patience.
-------------------------
Here are 3 examples:
A Class
 .
.  .
. 
S Class
 .
. 
SS Class
 .
.  .
.  .
. 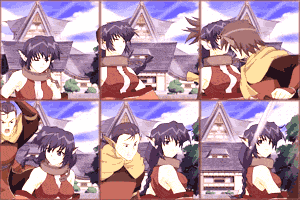 .
. 
Hopefully that was clear enough to give you a basic perspective on things.

Downsampling Settings
When you're downsampling a image.. uhh?!.. ok sorry, when you're resizing an image to a smaller size in px dimentions, yes concerning that there are a few boring things you should be aware of.
Well in the Image » Image Size... dialog box you should see a small drop down menu, that should have the value Bicubic. Well if you click it you'll notice several other options, instead of explaining any further I'll just give an example.
In .../My documents/My pictures folder there should be a file Blue_Hills.jpg
To ilustrate the difrences in size I'll just resize it to 500x225, and save it under the Gif 128 dithered setting. Here's what happens if I chouse a diffrent method.
63,623 bytes - Nearest Neighbor
61,143 bytes - Bilinear
60,627 bytes - Bicubic
60,319 bytes - Bicubic Smoother
63,552 bytes - Bicubic Sharper
Quote:
|
Originally Posted by PhotoShop Help
Nearest NeighborA fast but less precise method that replicates the pixels in an image. This method is for use with illustrations containing edges that are not anti-aliased, to preserve hard edges and produce a smaller file. However, this method can produce jagged effects, which become apparent when you distort or scale an image or perform multiple manipulations on a selection. BilinearA method that adds pixels by averaging the color values of surrounding pixels. It produces medium-quality results.
BicubicA slower but more precise method based on an examination of the values of surrounding pixels. Using more complex calculations, Bicubic produces smoother tonal gradations than Nearest Neighbor or Bilinear.
Bicubic Smoother A good method for enlarging images based on Bicubic interpolation but designed to produce smoother results.
Bicubic Sharper A good method for reducing the size of an image based on Bicubic interpolation with enhanced sharpening. This method maintains the detail in a resampled image. If Bicubic Sharper oversharpens some areas of an image, try using Bicubic.
|
Yeah that's the long way around the bush. Basicly Bicubic is good for gradients and the rest well... just go by trial and error. 
The Contrast Trick
Notice how in the exampels above the colors have been lightened or darkened by a lot. Well by doing this I've eliminated a lot of colors making it smaller.
Playing with Levels/Curves (both do the same thing) or with other settings will generally produce a better image while also producing a smaller one.
 Frame Capture
When you capture your frames try to save them at the highest quality posible. This will prevent artifacts, and produce solid colors. The more 'solid' the colors in your image are over the course of the animation the better.
If you encounter problems when loading them in ImageReady try routing them out early, before going to image ready by going to the folder they are saved in and using the film-strip display mode deleting the duplicates.
Timing
You may find that after you've deleted a lot of frames, the timing is screwed. Well it happens. The way to preserve the original timing is this.
First select all the frames and set the timing to .01 then start chopping frames off, only for each remember to count them and add the timing to the last one. For example if you have 3 duplicates you would delete 2 and add .02 to the 3rd, so it would have .03
Rememer not to delete key frames. Key frames are the start and end point in an animation they generally have a little longer pause or are higher quality then tween frames (the ones inbetween key-frames). Deleting key-frames is never good... NEVER
When deleting tween frames delete either the 2nd or the 3rd for example in the sequence: 1 2 3 4 5 6 7 8 9 you are advised to delete frames 2 4 6 8 or 3 6 9. This way the flow of the animation isn't disturbed.
Final Note
The awfull truth...
Many people seem to believe that the
Resolution of the image, as in the ppi (that you can change in
Image »
Image Size) actually makes a diffrence in quality. Well it got me going for a while, but apparently other then the quality of the printed out versions it doesn't effect web quality at all. You can mess with it, but you're wasting your time. Pixels per Inche (ppi) are only for printers.
