2004-09-12, 21:36
|
Link #1 |
|
Live wild and die young
Join Date: Aug 2004
Location: Sweden
Age: 36
 |
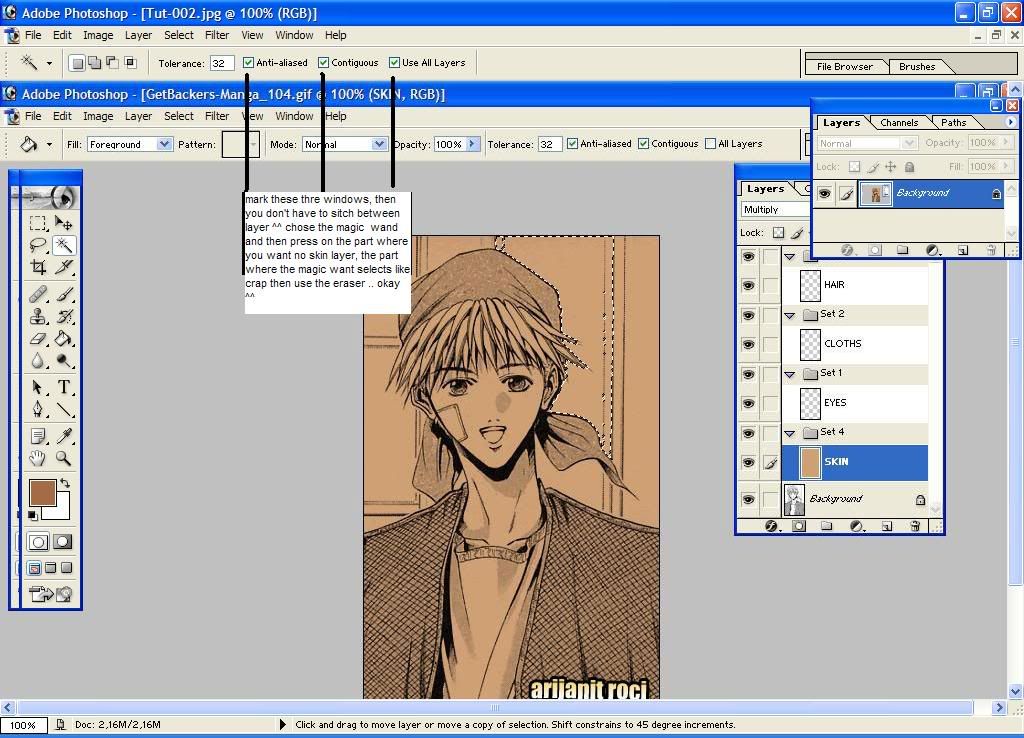
Step One: Open the file in photoshop 7.0 and make sure that the Image is in RGB mode, IMAGE >MODE> RGB COLOR. Now, that we have made the Image in RGB color its, time to color the Image, but first lets make some layer,, When I first started with photoshop, I hardly ever used diffrent layer,, I didnt know what good they were for. But now I know, and I think you guys will to ^^ anyway for this picture thar we have here (ginji) we only need 4 layers, 1 for the skin color 2 for the hair 3 for the eyes and 4 for the cloths, When we have done that I want you to create 4 sets, (what is sets?) I have marked on the Image the thing that create sets so dont worry, when you have done that to, I want you to put one layer in each set,, by layer I mean the sink, hair, etc put them in each there set,, Why are we doing this,, well you will see why in the future, not so far away.
When your done it should look something like this (look at the picture) 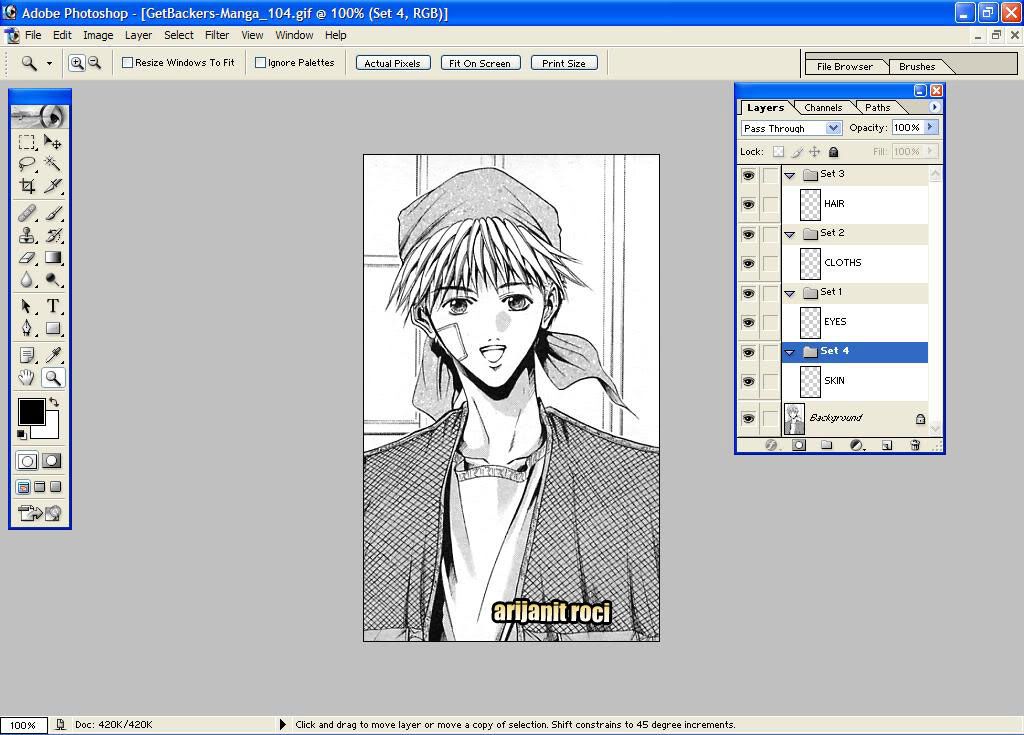 Step Two: Lets colour the skin.....Click on the colour pallet,, and chose a nice colour, I chose, R:216 G:184 B:133 for the skin colour. You can try anything you like,, but I just gave you a tip witch one you should chose. After you have chosen the skin colour, the press on the skin layer and go to the ..Paint Bucket Tool.. Make shore its the skin layer you have selected.. Okay now spill the colour on the layer with the paint bucket. The Image will look like the colour pallet,, totally skin brown, but that okay,, that will be changed soon , Now go to the layer pallet,, the is a little window there,, It has the mode NORMAL,, what you will do is,, change that mode to MULTIPLY ,, when you have done that the Image should look something like this look at the picture --- 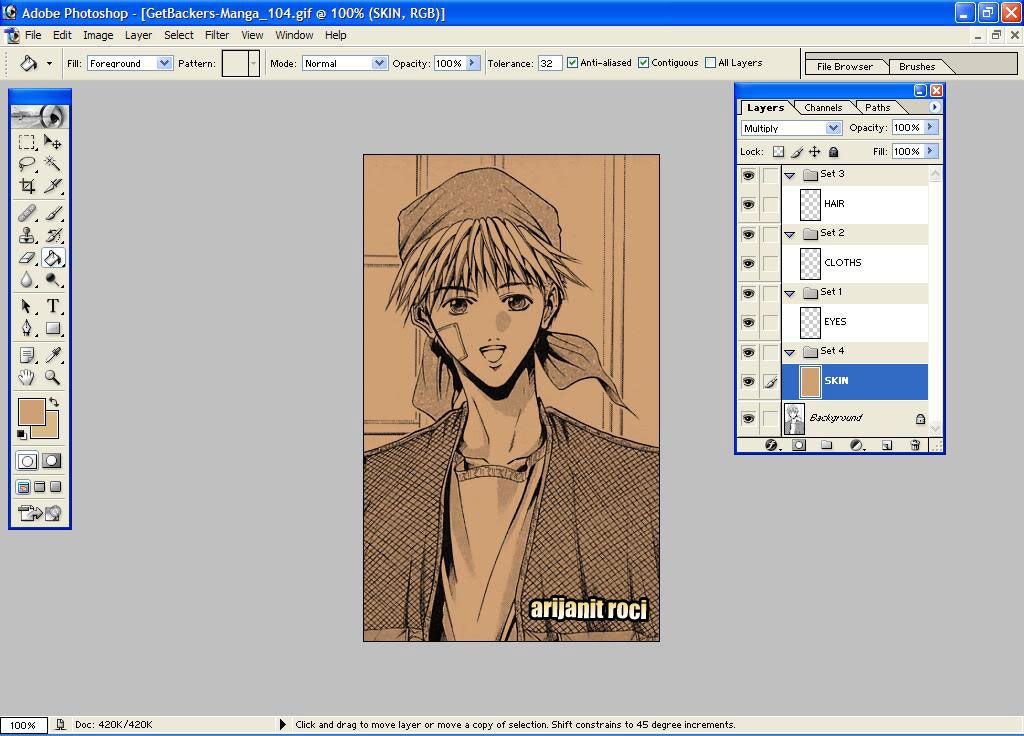 Step Three: now what I want you to do is , to erase all the arias that arent suppose to have the colour of the skin,, cloths hair ,background etc,, I usually use the magic want to do that I mark the place that arent skin and then press ctrl, alt and X,, when your done the Image should look like this ,,, Oh and remember make shore that it is the skin layer you have marked or otherwise you will erase the image... 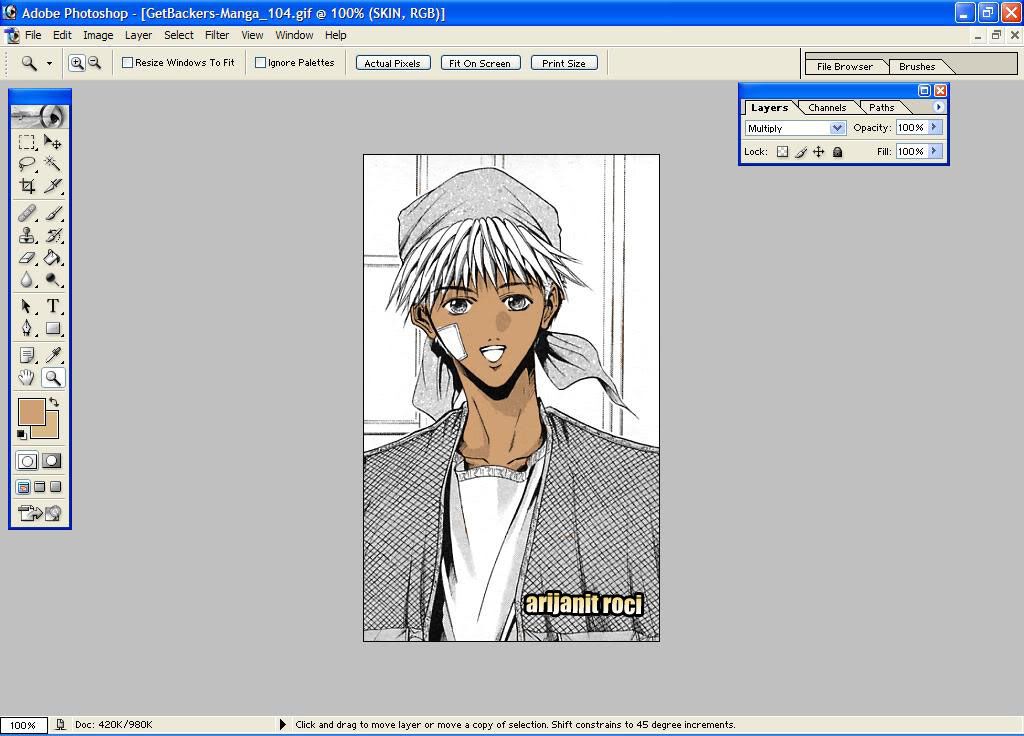 Step Four: I am a person that always does the skin first. What I want you to do now is to create a layer in the skin set and name it **skin tone**. Now lets do the shading ^^ First go and pick a darker skin colour, for the tone, just something darker than the foreground skin colour,, but not to dark, Okay,, Now click on the brush tool after that,, I want you to go to the top right corner of the screen and press on the thing where it stands !Brushes! When you have done that a window will appear, look at the Image and select !shape dynamic! And !Wet Edges! When you are done with this I want you to make the skin tone layer from NORMAL mode to,, DARKER mode , and when that is done, start colouring the parts where you think the light doesnt hit and it appears shadow, When I was done it looked something like this,, 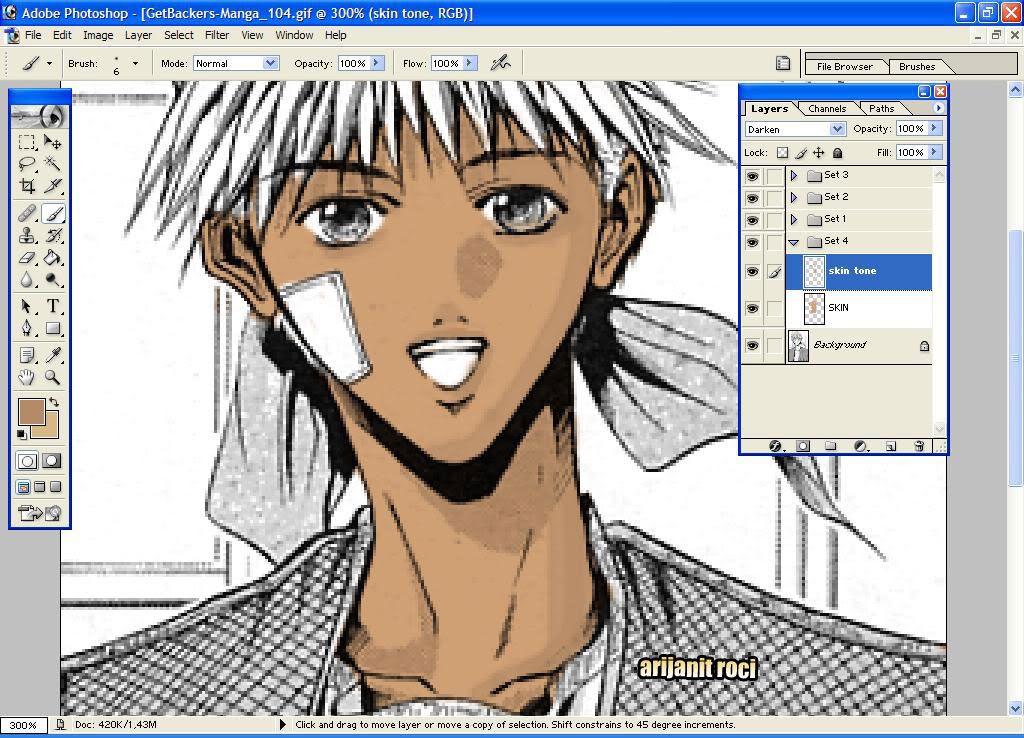 nothing much but it is suppose to look like that in the beginning :P anyway when you have done the first shadow,, then its time for the next one,, make the same thing again,, and this pick a skin tone that is darker than the previous one ,, when you are done with this it will look something like this 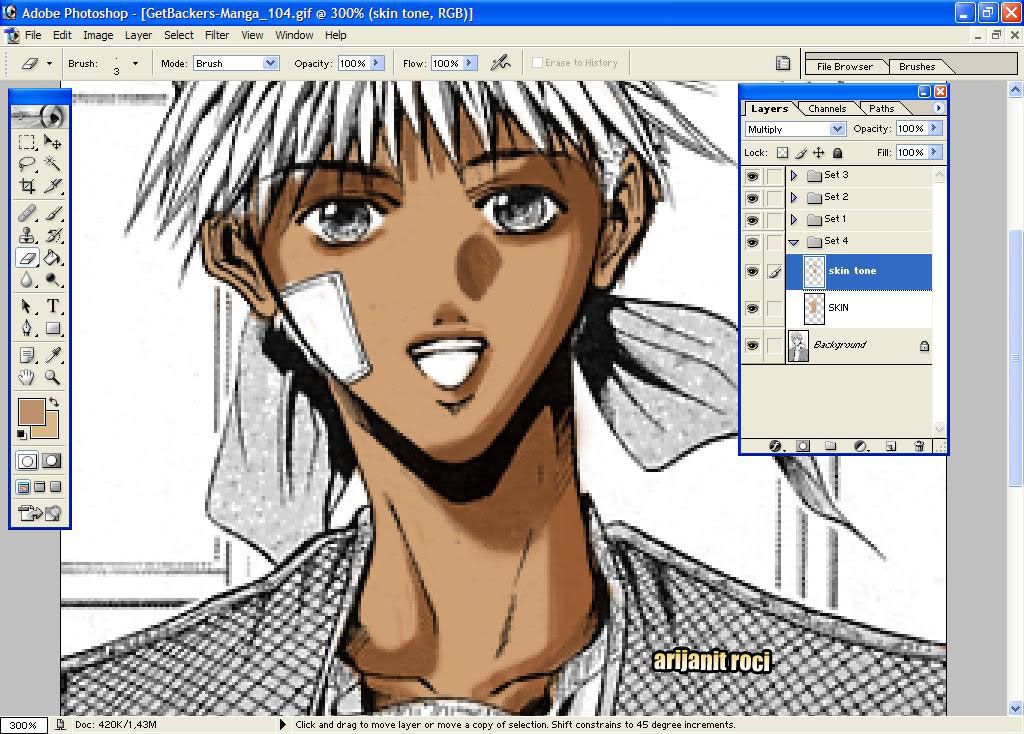 forgot to tell you,, change the DARKER mode into,, MULTIPLY .. Keep on doing this, I mean the skin toning , take a darker picture and colour the areas where the skin is darker,, I have 4 different types of skin tones,, I suggest you do the same,, when your done,, it will look something like this I made a little brightness and contrast too,, cause it was to dark,, if it becomes to dark I mean the skin tone, then I suggest you do the same,, go to Image adjustments and brightness and contrast 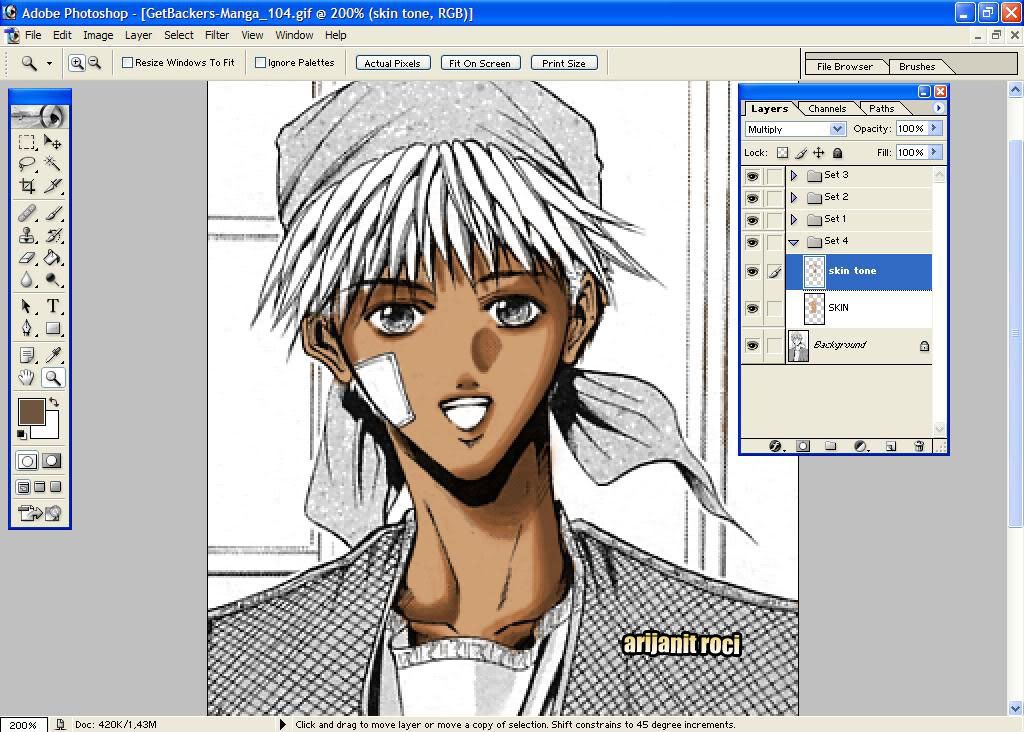 Step Five,, lets make the skin shine a bit,, But first merge the two skin layers, into one,, when the merge is done, the skin will look out of order, and all over the face,, but dont worry just change the layers mode from normal into multiply again , and the problem should be fixed this is my favourite technique, it give the Image a glow effect and makes it kind of cool,, and man it is so simple to do , pick the brush, and now go back to the foreground skin layer ps: shoes the same colour that you had on the forground skin layer cause its important that it is the exact same one to find that exact skin color is easy just press the eyedropper tool ,, Read what I have written on the image 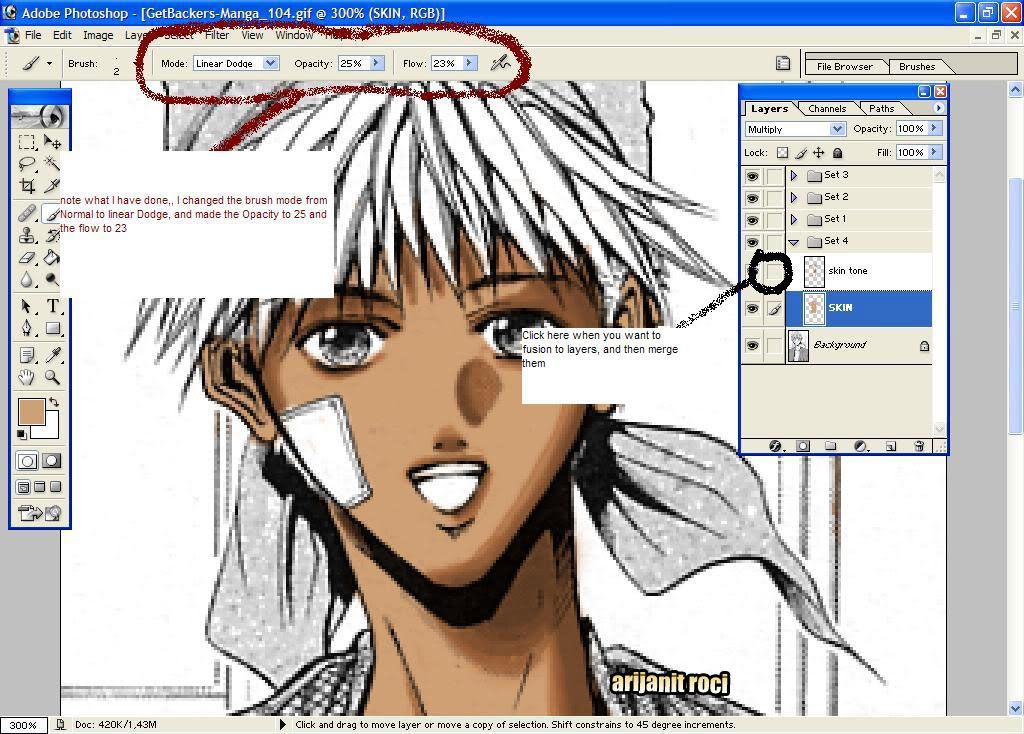 ,,, okay when you have I want you to take the brush and brush on the places where you think the light will hit the most and keep on brushing ,,on that spot,, until you find that the spot is starting to glow a bit.. when your done,, it can look like this 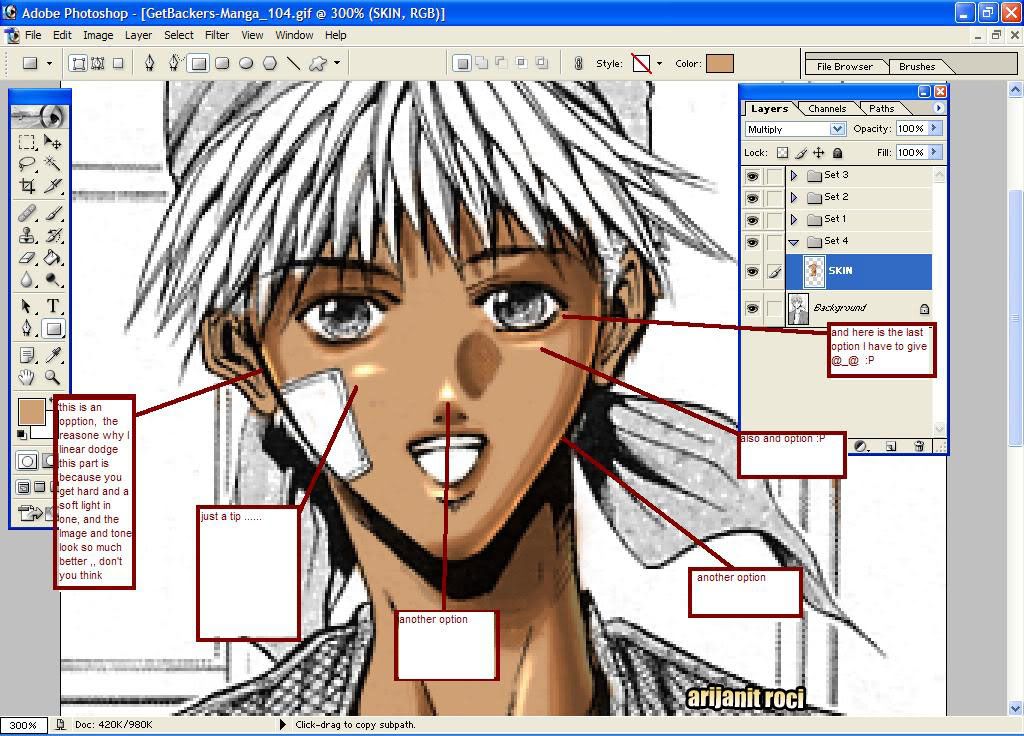 doesnt have to but might as well be like this ^_^ doesnt have to but might as well be like this ^_^ EYES Step Six: I think we are done with the skin,, the hard part is over ^_^ lets go to the eyes, Roll down the skin set and roll up the eyes set. The eyes can be really easy and really hard to do,, but this time I can say its quite easy, go to the eye layer and pick a colour,, when you have got the colour you want then start colouring the eyes, dont change the brush ore the opacity, flow,, ore the linear dodge mode for that matter ether,, just brush until you can hardly see the eyes, when you are done,, change the layer mode, from NORMAL to COLOR ,,, the eyes should look something like this now,,  thanks to the artist we didnt have to do any effects to make them look nicer,, the artist has made it easy for us,, hihihi Step Seven: Lets do the hair now ^_^ Pick a colour,, and now change the brush flow and opacity to 100% again and the brush mode to Normal again,, make the layer to MULTIPLY and then start colouring, And in the same way we did with the skin,, make a new layer , and make it into MULTIPLY ,,and then chose a darker version of the ground colour,, after you have done that ,, merge the to layers,, and make the layer mode to multiply, again,,, after that,, we change the flow and opacity of the brush again to 23- 25 and make the mode into linear dodge, before we start brushing where the light part should be,, make shore that you have the same colour as the ground hair colour,, ^^ when you are done with the hair,, it can look something like this 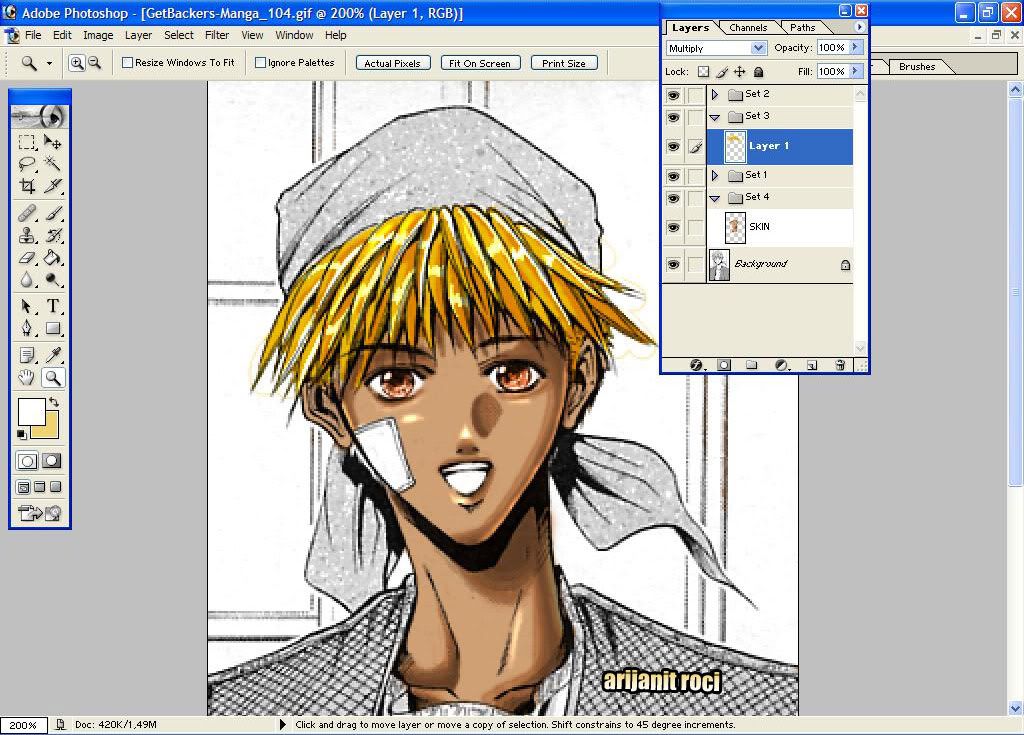 Step Eight: The final has come,, the cloths are the last part,,, I really cant say any more,, here cause I think you should fallow what I have said in the privies steps and use the same technique here,, make layer,, for different shadows and then use the linear dodge,, to make the parts more shine and give the Image some taste ^^,, I really hope I helped you guys, with my tutorial,, everything I know here took me some time to learn, I sat hour after hour, and tried all brushes,, and now I am here teaching you guys,, giving you a shortcut that wasnt given to me but should have been ,, anyway I say thank you for me It was fun doing this I hope you liked it and that you will use this technique and evolve to something more powerful, ^_~ I have no power to colour the hole Image today,, cause I am tired like hell you will see my finnished version tomorrow ,, thank you and good night |

|

|
|
2004-09-13, 00:09
|
Link #2 |
|
Yet Another No-Lifer
Join Date: Aug 2004
Location: Finland, Raahe
|
cmon, im new, and i want to learn how to color, but tell as easy as you can: how you make those layers. I know that they are important and all, but i dont know how to make them! or if i make one, the others disappear!
|
|
|
|
|
2004-09-13, 00:50
|
Link #3 | |
|
*
Join Date: Mar 2004
Age: 37
|
Quote:
To make a new layer, just go to the Layer menu, and choose "new"... layer. Or press "shift + Ctrl + n". Make sure you always have the right layer selected under the layers palette though... It can't disappear out of nowhere  Thanks Niti for taking the time to make this tutorial I'll make sure to try to go through it later, I always have wanted to learn how to color digitally 
|
|
|
|
|
|
2004-09-13, 02:12
|
Link #4 |
|
Live wild and die young
Join Date: Aug 2004
Location: Sweden
Age: 36
|
Oh my,, I am sorry,, but this is a colouring totorial , not a tools tutorial,, to be sirus I thought that people that have photoshop know how to make layers, but then after choses not use them,, ohh what to do I am sorry,,really am..
 Okay,, I made a litle tutorial just for you,, here is an Image that explains all the tools that I used for this tutorial,, I hope it helps,, 
|
|
|
|
|
2004-09-13, 02:49
|
Link #5 |
|
Yet Another No-Lifer
Join Date: Aug 2004
Location: Finland, Raahe
|
Thanks, i already know many of those things (i have used photoshop only once before
) but i am STILL wondering how to get that menu open where you can see all those layer options? i hope you understand what i am saying...EDIT: and btw, im already coloring one picture, but not with those nasty layers, so ill put it here when it is ready, be prepared´
Last edited by CrackHack; 2004-09-13 at 03:32. |
|
|
|
|
2004-09-13, 08:36
|
Link #9 |
|
Live wild and die young
Join Date: Aug 2004
Location: Sweden
Age: 36
|
I am glad you guy's liked it ^^ Oh Crack Hack,, press were it stands Window,, and the a list will come up, after that press layer,, and the the layer pallet will appear
Yeah I will post the finished version ^^ |
|
|
|
|
2004-09-13, 10:28
|
Link #12 |
|
Sakura's so cute!
Join Date: Sep 2004
Location: The Great open Sea!! off course
Age: 40
|
Wow Niti this is very nice, but i think this requires a lot of practice.. But i have some spare time. You should go and paint manga series like naruto or something.
Very nice tutorial, thnx.  [Offtopic] I'm currently doing another tutorial from Adobe® Photoshop® Tips & Tricks. It's an ISO i downloaded with 12 chapters tutorials, very good stuff. |
|
|
|
|
2004-09-13, 10:44
|
Link #13 |
|
Live wild and die young
Join Date: Aug 2004
Location: Sweden
Age: 36
|
well I would do that,, but I don't have time,, I have my own manga ^_~ this tutorial alone took me some time, and If i hadn't done it this morning at 3 am I really don't think I would have done this totorial this week, =_=
|
|
|
|
|
2004-09-13, 10:57
|
Link #14 |
|
Member
Join Date: Sep 2004
Location: Uk, nearish London.
Age: 37
|
this might seem trouble-some, but could someone explain how i use the magic wand properly ^_^. i get the basic principle of it, just not the process .. !
edit: i get to ctrl+alt+x but i see the plain fill only, should i see the background layer ? i dont know how else i would accurately remove the excess colour, leaving the skin. Unless your only meant to do this roughly and the rest by hand? ;x |
|
|
|
|
2004-09-13, 11:06
|
Link #15 |
|
Live wild and die young
Join Date: Aug 2004
Location: Sweden
Age: 36
|
well lets say you want to select an erea,, the backgound for example ,, okay click on the backgound ,, the selected areas will have like a chainsaw rop around it,, (make shore that you select,, the backgound layer when you select,, when you have selected then go back to the layer that you want to erase some part, press ctrl +X and the eareas that is marked will wanish
I hope this is what you are asking about,,,, if you think the magic wand is hard to use, then use the eraser, and just erase the part that aren't suppose to have the,, ''skin color''' for example |
|
|
|
|
2004-09-13, 13:16
|
Link #20 |
|
Member
Join Date: Sep 2004
Location: Uk, nearish London.
Age: 37
|
 well its taken me a couple hours at the least, dont want to imagine it without this tutorial *shudders*.. mouse drawing sucks now im off to get food. nice tutorial Niti! needs some tidying though. but overall... amazing job! thanks. edit: couldnt work out how to start the hair, well so i gave up after a few tries :<.. |
|
|
|
 |
|
|