 2012-03-25, 20:18
|
Link #601 | |||
|
Love Yourself
Join Date: Mar 2003
Location: Northeast USA
Age: 38
|
Quote:
Quote:
Quote:
__________________
|
|||

|

|
|
2012-03-26, 16:30
|
Link #602 | |||
|
Paparazzi
Join Date: Mar 2008
Age: 41
|
Quote:
 Okay they're decent compared to Pentax but apart from those I really have a hard time coming up with something that's worse. My opinion of course. Okay they're decent compared to Pentax but apart from those I really have a hard time coming up with something that's worse. My opinion of course.I'll have to look into the AF point selection once I get my camera back. I remember playing around with some settings in the (optimistically named) super control panel but if I remember correctly there was only option to change between the preselected single focus point or automatic focus point selection. Can't do that now because I borrowed my camera to my dad for his trip to France and am suffering from withdrawal symptoms. Quote:
Speaking of which... I went completely and utterly mad and put a new lens on order. Not a legacy lens by age but design... Be prepared for some BOKEHPORN. It's going to be one fast lens. Won't be lusting after the Leicasonic 25mm 1.4 no longer either. Too slow...  Quote:
___ Some more photos from 2010/2011 (10% rule does no longer apply. Turns out it's nowadays more like 0,2% rule...) Only second Japan batch to go and I'm again up to speed in terms of keeping you guys up to date with my photographic endeavours. Yes I know I've been slacking off horribly. |
|||
|
|
|
|
2012-03-26, 16:45
|
Link #603 | ||
|
Love Yourself
Join Date: Mar 2003
Location: Northeast USA
Age: 38
|
Those sky shots are fantastic!
Quote:
Are you familiar with the autofocus technologies in DSLRs and mirrorless cameras, and the differences between the two? With µ4/3 cameras (contrast-detect autofocus) the scene as "seen" by the sensor is analyzed and used for autofocus. The benefit of this is that it's pretty much "what you see is what you get" so there is no front- and back-focus. It also means that in theory, a focus point could be as large or as small as you wanted, and it could be placed anywhere in the scene. Panasonic's µ4/3 cameras, with their touch screens, allow you to do this. The E-P1 doesn't allow you to resize or freestyle autofocus points, which is an artificial limitation and a carry-over from their DSLRs. I think that they now allow autofocus block resizing, but I'm not positive about that. Quote:
This system isn't great for bokeh, though... I have the 4/3 variant of the 25mm f/1.4 summilux. It's a fantastic lens and I love it to bits, but then I realize that it's basically the equivalent of a 50mm f/2.8 lens on a "full frame" camera... sigh. [quite]I wonder if EM-5 having extremely fast AF by itself might actually help with the issue. Then again I don't know how the AF commands work in Olympus cameras. I do have to say that I don't have all that much good to say about AF speed on E-P1 so if using adapted 4/3 lenses makes it even slower I really see your problem with using them.[/quote] Because it's all CD-AF, autofocus speed is heavily dependent on algorithms, processor power, and lens architecture. The E-P1 is more or less standard-fare, but the latest cameras are now packing multiple processor units and other fancy things that result in the faster autofocus speeds. This has resulted in a slight boost in speed to the 4/3 lenses, as well, but it's still not comparable with their speeds on native 4/3 cameras. As far as I understand it, the reason why has to do with commands given to the lens. With phase-detect autofocus, the autofocus sensors measure how "out of phase" the image is and give the lens a set distance to move (say, +8 or -6). The lens shifts, the system may re-measure the focus (or not), and then you're done. With contrast detection, the camera just sees what the image is and isn't sure exactly how much the lens position needs to shift. It seems as if the CD-AF commands to the lens are basically forward, backward, and stop. If you're using a lens that doesn't support CD-AF, it seems as if the camera just issues commands like +1, +1, +1 and such to emulate the CD-AF commands, which results in the speed loss.
__________________
|
||
|
|
|
|
2012-03-26, 18:04
|
Link #604 | |||||
|
Paparazzi
Join Date: Mar 2008
Age: 41
|
Quote:
Quote:
EM-5 does have touch to focus feature and I'm fairly sure I won't be able to speak myself out of buying it. Just can't see my self justifying buing a E-P3 as a second camera just because of the touch to focus option. Quote:
Quote:
Straitjacket stuff on my budget and you could have put my bank manager to the same padded room with me if that would have been the case. 25mm f/0.95 Nokton will have to do although even that would probably call for change of medication... Then again I've been cheapskating on lens purchases and taking advantage of the possibility to borrow lenses from work so I suppose I'm allowed get a bit carried away every now and then. I hardly ever took the 50mm of my Canon anyway despite of being a bit bothered by the focal length on the crop body. Would have wanted something like 35mm f/1.4 but never got around to getting one. Samyang's manual 35mm would have been cheap as chips. Anyway the Nokton should fix my fast prime normal lens cravings. And as for my misgivings on PEN's AF functionality... Not a problem.  True enough µ4/3 or 4/3 for that matter isn't really optimal for shallow depth of field photography but now that there are lenses with decent maximum aperture like 45mm f/1.8 Olympus (and a few with positively insane ones) the difference to a camera with 1.5 or 1.6 crop factor isn't really that big. The Nokton would be equivalent of roughly 32mm f/1.2 in terms of depth of field on 1.6 crop and that's pretty damn good. Full frame (and medium format for that matter) is still in the class of it's own and even there the mad 50mm Noctilux on M9 is really in the class of its own. Had a chance to shoot a few photos with that combo and even though I'm not fond of M9 that was something else. Speaking of Leicas if the M10 indeed has B&W Sony sensor (without AA-filter) as rumored it might be the first Leica I might actually want. Price tag is going to be out of this world again naturally. But that would actually make for a very interesting camera. Noise performance and sharpness should be something else. Quote:
 ) nowadays there's really no reason in there either. Furthermore I think I heard CIPA was expecting the market share of mirrorless systems in Q1 this year to be for the first time larger than DSLRs in Japan and the rest of the world seems to be following suit. So it would really be pity if the camera manufacturers don't come up with some way to fix the lens compatibility. I'd put money on it that in 6-8 years there aren't any consumer/prosumer DSLRs available and a only few pro models. ) nowadays there's really no reason in there either. Furthermore I think I heard CIPA was expecting the market share of mirrorless systems in Q1 this year to be for the first time larger than DSLRs in Japan and the rest of the world seems to be following suit. So it would really be pity if the camera manufacturers don't come up with some way to fix the lens compatibility. I'd put money on it that in 6-8 years there aren't any consumer/prosumer DSLRs available and a only few pro models.Interesting times. Last edited by escimo; 2012-03-26 at 18:18. |
|||||
|
|
|
|
2012-03-26, 19:21
|
Link #605 | ||
|
Love Yourself
Join Date: Mar 2003
Location: Northeast USA
Age: 38
|
Quote:
Some would say that shallow DoF is cheap and overused... personally, I like it. I don't care to have the background blown into one big color, but I like it when it looks almost like an undetailed painting. You can always close the aperture a bit, but you can't open it beyond the maximum! Some day I'd like to get a Nikon D700 or D800 for the DoF potential... Quote:
It's also possible that they'll just ignore and abandon their 4/3 lenses, reproduce them in µ4/3, and forget about phase detection all together. I don't know that such a thing would make financial sense, but it's up to them. I would think that the ideal system would utilize both PD-AF and CD-AF, relying on PD-AF for the initial fast calculation and then handing off to CD-AF near the end of the focus sequence. That would give the speed of PD-AF and the accuracy of CD-AF. CD-AF has become pretty fast (with certain lenses), but it seems to me that it begins to slow down dramatically as the lighting gets worse. PD-AF loses a bit of speed in poor light, too, but the difference isn't as apparent.
__________________
|
||
|
|
|
|
2012-03-27, 18:17
|
Link #606 | ||
|
Paparazzi
Join Date: Mar 2008
Age: 41
|
Quote:
D800 indeed seems like one hell of a camera. Even as a bit of a canonist in rehab I do have to say, assuming I had the budget which I don't, that would be the one I'd go for. Just the overall expense of body, necessary accessories and a fair selection of lenses that in terms of quality do justice to that monster of a body being somewhere closer to 10k puts me off quite a bit. No... Not a bit. A lot! Quote:
I suppose I would have learned to live with it but still it was painfully slow. Okay the 25mm pancake isn't a fast focusing lens to begin with. I've been in the impression that there isn't such a huge difference in technical implementation of the actual motor between µ4/3 and 4/3. To my knowledge all µ4/3 lenses use micro motor so by applying some logic they should be just as slow as mm 4/3 lenses and slower than SWDs. So either the camera's AF commands are different and translated into actual motor commands in the lens itself (which would make sense since the motors can be quite different) and the implementation of 4/3 commands on µ4/3 bodies has been made by a retarded chimpanzee or Olympus have purposefully crippled the AF performance of the 4/3 lenses. Since the focusing on a µ4/3 lens would by my logic be done just as incrementally as with 4/3 lens I'm actually starting to suspect the latter. Oh well... It's always good business to get your customers to buy more stuff that they wouldn't in ideal world really need by being a Dick Dastardly and not actually getting caught doing it. Those b******s I'm not quite convinced that going back to phase detection is actually any solution. The only reason I can see why phase detection has been used for so long is that CD-AD hasn't really worked all that well and now it very very nearly does. Okay the low light performance isn't quite on par with PD-AF but it's getting quite close. PD-AF systems are actually quite pricey and the accuracy leaves quite a bit to be desired compared to modern CD-AF systems. And don't even get me started on those semi transparent mirror abominations that Sony's nowadays pushing. Suffices to say in my opinion one of the most retarded ideas ever. They didn't even manage to reduce shutter lag to any measurable degree so the only benefit is the reduced shock, which is only a plus if you don't know what you're doing, and slightly quieter operation at the cost of 30% reduction of transferred light to the sensor. Not to mention that because the they needed to maximize the light transfer to the actual sensor the AF-system ends up making due with quite a bit less light than in a traditional PD-AF DSLR. None of which a trades I'd be willing to make. Okay Live View PD-AF is neat but only if the CD-AF sucks as much as it does in many DSLRs and following/continuous focus should still have a slight advantage over CD-AF. But still trying desperately to figure out why not to use CD-AF instead of trying to fix its shortcomings seems a bit moronic. Simpler is almost invariably better and CD-AF mechanically is simpler and not by a small margin. It's nice to talk shop at asuki again. _____ Anyway got through the rest of my Japan photos quite a bit sooner than I expected. Japan Batch 2 |
||
|
|
|
|
2012-03-29, 11:57
|
Link #609 | ||
|
Paparazzi
Join Date: Mar 2008
Age: 41
|
Quote:
As for Japan, as I said I absolutely loved it. I just have to go back there. Quote:
____ Got my Voigtländer. Wide open it's not what you'd call sharp. Especially close up or focused at infinity. But boy is it fun and produces some very dreamy images. Then from about f/1.7 onwards it becomes scalpel sharp. Fantastic lens. Although to get some bokehlicious stuff you need to keep focusing distance at about 1-1.5m max. Speaking of dreamy stuff. Just a quick snap. And one new sig... 
|
||
|
|
|
|
2012-03-30, 17:48
|
Link #610 |
|
Paparazzi
Join Date: Mar 2008
Age: 41
|
Did some further testing with the Nokton.
Took some shots with a combination of some natural light and two candles. Mostly just testing the capabilities of the lens in difficult lighting conditions and trying out ways to get the most out of the photos in post-processing. Did end up getting some interesting results. Thumbnails are links to high-res versions which are a bit on the heavy side this time.          |
|
|
|
|
2012-03-30, 18:17
|
Link #611 |
|
Love Yourself
Join Date: Mar 2003
Location: Northeast USA
Age: 38
|
Nice figurine you have there! While the Nokton isn't the sharpest wide-open, lens tests that I saw looked pretty decent. By f/1.4 it was already essentially matching sharpness with the Leica D Summilux 25mm f/1.4, which I think is still considered to be a bit sharper than the DG Summilux (µ4/3) version. I'd get one if I could afford it - being stuck at f/1.4 for "high quality" shots, with the ability to "break the sound barrier" and open it up to f/0.95 when needed? Yes please
I don't know that many others on the forum can appreciate just how awesome it is that you have a Nokton. If you want to stir some jealousy, consider posting to the photographs thread. It's mostly a bunch of beginners there (except for Drake - he's quite good), but I think a lot of them will be able to appreciate what f/0.95 means Anyway, post more Nokton shots as you make them!
__________________
|
|
|
|
|
2012-04-03, 17:05
|
Link #612 | |||
|
Paparazzi
Join Date: Mar 2008
Age: 41
|
Quote:
Quote:
Quote:
I'll just drop this one here since it's more of an experiment once again. Taken with E-P1 and Nokton. Composed of two shots one focused to the doll and one to infinity. So I could screw around with depth of field even more. Lit with two small led flashlights. One static bounced off a sheet of white paper to diffuse the light, other hand held with piece of red plastic in front of it bounced off the nearby wall and moved during the exposure. Camera was placed on a tripod and self timer was used again for exposure so I got to wave the flashlight around in peace. RAW files were processed in Lightroom and the processing settings were synced between the shots. Then the whole thing was put together in Photoshop with quite a bit further tweaking. Some further lighting effects were added as well. And yes... I know I need to wash my windows... |
|||
|
|
|
|
2012-04-06, 14:36
|
Link #613 |
|
Paparazzi
Join Date: Mar 2008
Age: 41
|
Miniature and Figurine Studiowork - Downscaling for the Win
Miniature and Figurine Studiowork - Downscaling for the Win
Part One Figurine - Traditional Studio Portrait Prologue: There are a quite a few instances where scaling down is a really good thing. In product design, especially one involving physics like aerodynamics, upcoming products are constantly tested in scale. This is of course about cost savings. Wind tunnel testing a Airbus A380 in full scale would be extremely difficult because of the shear size of the thing and thus insanely expensive. There are naturally pitfalls and one of the things engineers need to take into account is similitude, how the physics of what ever is being tested scales down (or up for that matter). There isn't really anything preventing to applying this to photography. Naturally if you want a studio shot of a real life model you don't have the option of going small scale. As far as I know "Honey, I Shrunk the Kids" hasn't happen outside of cinemas yet. However if you're just learning photography and want to experiment with working methods involved with studio photography going small scale is a great idea. Benefits of it are clear. First of all, you don't need a big photography studio, which tends to be the hardest thing to come by especially when you're just beginning to experiment on it. If you find a studio, you'll probably have to pay rent for it and if the one renting it finds out that you're a complete newbie the chances are you won't find a single piece of studio photography equipment in there apart from a backdrop. So you'll end up having to get your own lights as well. This mounts up to a lot of money. Then of course you'll need to find someone to model for you. Professionals once again cost money and might be a bit reluctant to work with you if you're actually not going to publish anything outside of your Flickr feed. Professional models tend to want their work to be used in something that works as a reference for them as well. Having the pleasure to tell having worked for a photographer who's never seen a soft box up close and personal in their life doesn't really inspire confidence in them that the shoot will present the model in a great light. The chances are they're not trusting you to produce stuff that they'd want in their portfolio either. Employing friends, partners, relatives etc. is of course an option but even so more often than not you'll have a mountain to climb to convince them to do it. However this means that you'll have to go inanimate with your subject. One major part of the process is of course lost, but you'll be able to get some confidence with the mechanics of it so when you move up to a real studio and a real model, you'll have some idea what you can do, what you should do and what to avoid technically. It saves you some time since you don't have to experiment quite so much on a conceptual level while in studio. So you can focus on familiarizing yourself with the equipment and the model and trying to get the most out of them. So in essence this is product photography done in portrait style. Directing a model is an art on its own and a subject I'm not going to touch. As a related issue, poses you can to some very limited extent simulate with figurines. They also are something that I'm not really confident with so I'll just use some very generic ones and later in the second part which is coming later I'll experiment a little with a bit more unconventional poses and framings. For now it's just traditional pose with traditional 3 and 4 light setups. Equipment used: Camera gear: Olympus PEN E-P1 Voigtländer 25mm F/0.95 Nokton Manfrotto 190DB tripod Manfrotto 486 RC2 ball head Backdrop: Cardboard box Ilford Galerie Classic Pearl Paper - printed with Canon Pixma iP4300 inkjet printer Double sided tape Lighting: 3x Small Led torch Paperboard Skewers (wooden) Parchment paper (bleached) Aluminum foil Black electrical tape Double sided tape As you can see apart from camera gear virtually NO money was spent on other equipment, so if you don't put a very high price on your own labor these experiments are dirt cheap. All of above are pretty much household items and if you're missing something you'll find them in almost any convenience store. You don't need to use photo paper as a backdrop regular copy paper will do. If you have them I'd recommend using some kind of heavyweight paper which is not fully glossy though since it isn't quite as translucent as regular copy paper. Glossy papers create quite nasty highlights so choosing between copy paper and glossy photo paper, I'd go with the copy paper. As for parchment paper, tracing paper would have been better than parchment paper but I didn't have that available since this was a bit of an impromptu shoot and tutorial. About camera gear. Use what you have available. You don't really need much. Since you'll be shooting at very close focusing distances you'll even get a little bit of background blur (which is what you want) with a decent digital compact camera. That being said you'll need a lens (or a camera in case of compacts or bridge cameras) which has a relatively close focusing distance in relation to the focal length. If you have that covered you're pretty much set. Tripod is optional but with the kind of lighting gear I'm using exposure times using low ISO will be long. Tripod will also provide the added benefit of enabling you to work away from the camera (either with remote or self timer) so you can use hand held lights etc. If you don't have a tripod and plan on buying one, here are a few tips. First and foremost, don't be cheap. Cheap tripods are sh** you'll be putting on it a camera and a lens that might have set you back quite a sum of money, you don't want it to be made out of tracing paper and chopsticks. Don't by one blind unless you're ready to invest a fair amount in it. Try it out. See how stable and sturdy it is. By the sturdiest one you can get for your budget. It really is better to have a heavy one than a flimsy one. If you plan on doing more miniature photography get one with an invertible center post. There will be a photo of my setup later on that explains what that means and why it is a good thing. Lights: Basics: Snoot is a highly directed light. It creates an intense area of light on the subject, very strong contrast and sharp shadows. This used in fairly special applications as a key light but in the most conventional three point lighting setup snoots are often used as rim lights or hair lights or back lights as they're often called, mostly to avoid light spilling but at quite a bit lower intensity. Softbox and umbrella are quite similar in application however softbox produces lower contrast and softer shadows out of the two. Both are large area lights, the area of the light source is high. Because the the led torches produce very directed light to get these to work properly the setup ended up being a bit more fiddly than when using actual studio lights which generate a wider beam and more uniform light. More on that later on. Terminology: -Key light: The primary light source. -Back or Hair or Rim light: Light placed behind the subject usually directly opposite to key light to create a "rim" of light around the subject to add separation from the background. -Fill light: Light or a reflector placed in this case in the front of the subject but opposite side than key light to soften the shadows on the subject and provide illumination to the side of the subject opposite to key light but still facing the camera. -Background light: Well the name says it all. Light used to light the background. Equipment preparation: I didn't plan on writing a tutorial on this when I built the stuff so I didn't take any pictures of the process but I'll try to give you some kind of instructions on how I built the the various things. It's rather simple so I'm sure you'll figure it out without pictures. Snoot: Making a snoot is a relatively simple process roll a piece of paperboard into a cone shape and cover both sides of it with black tape. Here's a picture of the end result put on a flashlight with a piece of parchment paper taped on the business end to diffuse the light a bit.   Softbox: Building a softbox is a bit more fiddly. What you need is 3 triangles of relatively same size and shape. Tape aluminum foil on the inside (this is much easier if you tape the foil first and then put the pieces together) or if you're lazy like me use a cardboard juice carton they tend to have an aluminum lining. Finally when you have the shape together tape a piece of parchment paper or tracing paper on the open end and cut of the tip of the pyramid you just created enough to get the flashlight in. I used a similar setup with the flashlight with parchment paper taped on it as with the snoot since the light was very focused and I got a nasty hotspot on the softbox.   Umbrella: Another slightly fiddly build. You need to make two paper board cones. One larger with a steeper angle and one smaller with a shallow angle. Place the smaller cone inside the larger one and tape the two together. Place a piece of aluminum foil on the inside of the cone, which now should have roughly parabolic shape, using double sided tape. This doesn't have to be perfect, not even close in fact, the light will be very diffused anyway so wrinkles will not affect the outcome by any measurable degree. Once you're done with that just stick a skewer through the whole thing and fix it into place with tape. Then tape the flashlight on the shaft. I once again used one with a piece of parchment paper taped on it.    Other equipment: Reflector: Just tape a piece of aluminum foil on a piece of paperboard matte side out. Couldn't be simpler. I actually didn't even use tape.   Backdrop: Almost as simple as the reflector. I printed just the backgrounds on a few sheets of paper which I taped together and taped them to a cardboard box to keep it upright. For traditional portrait background I used one of Photoshop's basic effects "Clouds" (Filter->Render->Clouds). Made them brown which isn't all that traditional color for the backdrop but since the Miku figurine I used has TURQUOISE/GREEN hair. A more traditional bluish gray wouldn't have really worked all that well. When shooting a portrait what you want is separation from background not blending with it but the background has still to be subtle so that it doesn't draw focus from the subject. The setup: Picture speaks more than a thousand words so here are 4000+ words. Key light was in this case placed in front of the subject on the right side, reflector used as the fill light was on the front left. Background light was behind the subject on the right and rim light behind the subject on the left. This would make it very basic 4 light setup. For the actual photos I held the key light and the reflector in my hands and did the exposure with self timer. A three light setup was also used which I didn't photograph. The only difference basically was removal of the rim light.     Four light setup: Here's a shot using the four light setup as explained above. As the lens is manual and thus the EXIF-data doesn't have the F-number, this was shot at F/4.0. The depth of field seemed too shallow which was one of the reasons why this wasn't the money shot.  The money shot: The shot I thought best out of the ones I shot was a three light setup. Key light using the umbrella, fill light using the reflector and background light using the softbox. I uploaded all the raw files so some of them have the rim light as well. But it seemed unnecessary and slightly distracting to my taste. This was shot at F/8 for nicer depth of field. You see, I said you don't need a fast lens.  Part two on miniatures and some more advanced figurine stuff will follow suit later. In it I'll go through some cheap tricks. But I'll need to pop by a hobby store for some colored papers and stuff and redo the setup and find the time to do all of it. Files: Background print RAW files (converted to DNG and Zipped) And finally here's a bonus picture taken during setup... 
Last edited by escimo; 2012-04-06 at 16:09. Reason: Some proofreading. |
|
|
|
|
2012-04-09, 16:34
|
Link #614 |
|
Paparazzi
Join Date: Mar 2008
Age: 41
|
Photos photos photos...
Bad capture -> insert artyfartycrappify filter -> brilliant... Well perhaps not.      I also started to go through some of my old photos and reprocessing them with Lightroom 4 since the RAW processing in it has gone through a major overhaul and is actually really really good nowadays. As a bonus Adobe dropped the price to less than a half of what it used to be. Now that it's something like $150 it really is a must buy for anyone who has a RAW capable camera.    |
|
|
|
|
2012-04-15, 16:42
|
Link #615 |
|
Paparazzi
Join Date: Mar 2008
Age: 41
|
Last Tuesday I had some kind of twister brainwave to start a 365 project. Well, a modified version of it anyways. The original concept would have me take a daily picture featuring myself starting on Jan. 1st so that it would serve as sort of a photographic journal of a calendar year. I didn't find that all that appealing but what I liked was the idea of actually finding something to shoot every single day, without exceptions. So I took that part out of the original idea and tossed away the rest.
I'm on my day 6 now so I'm 1.6% done with it. Anyway I thought I'd share what I've come up with so far. There's some background info and random thoughts related to the photos, on the project blog, liked in my signature. I hope I got away with the blatant advertisement...  Day 1. 2012/04/10 by Finnish Eskimo, on Flickr 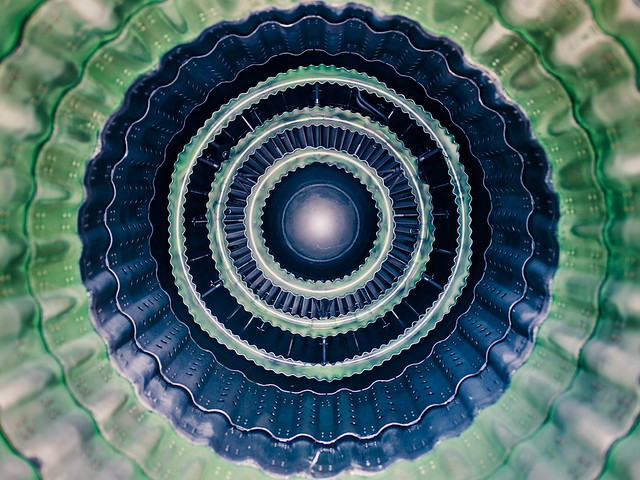 Day 2. 2012/04/11 by Finnish Eskimo, on Flickr 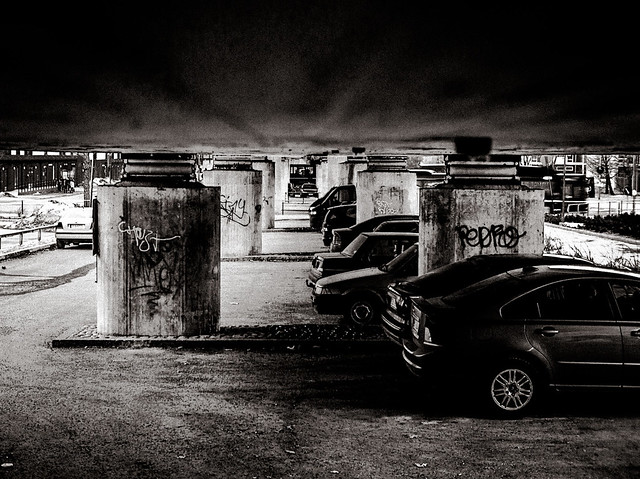 Day 3. 2012/04/12 by Finnish Eskimo, on Flickr 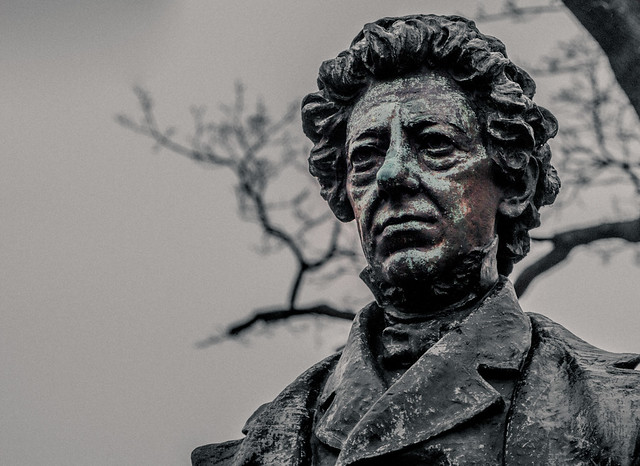 Day 4. 2012/04/13 by Finnish Eskimo, on Flickr  Day 5. 2012/04/14 by Finnish Eskimo, on Flickr  Day 6. 2012/04/15 by Finnish Eskimo, on Flickr BTW, Day 5 photo was taken for the part 2 of the miniature+figurine tutorial, so it's in the works. Probably coming up in a week or so. |
|
|
|
|
2012-04-22, 17:26
|
Link #616 |
|
Paparazzi
Join Date: Mar 2008
Age: 41
|
Last weeks 365 project photos.
 Day 7. 2012/04/16 by J. Savio, on Flickr  Day 8. 2012/04/17 by J. Savio, on Flickr  Day 9. 2012/04/18 by J. Savio, on Flickr  Day 10. 2012/04/19 by J. Savio, on Flickr  Day 11. 2012/04/20 by J. Savio, on Flickr 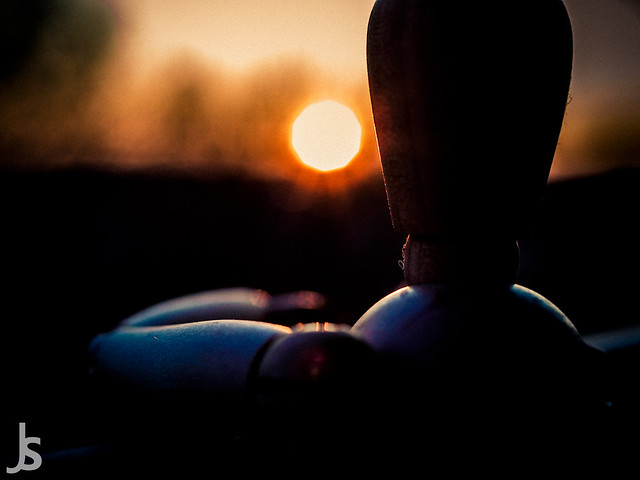 Day 12. 2012/04/21 by J. Savio, on Flickr  Day 13. 2012/04/22 by J. Savio, on Flickr PS. If somebody is waiting for the miniature tutorial... Sorry, it'll be a while longer. |
|
|
|
|
2012-04-26, 18:41
|
Link #617 |
|
Strangely dependable...
Join Date: Nov 2006
Location: some random place out there...
|
All your photography works really inspire me to get into photography right now.
Hmm, it'll be my goal hobby for after graduation. Love the "photo shoot" set-up you showed for Miku. I never would have thought that's how it is done. Lovely scenery pics too!
__________________
|
|
|
|
|
2012-04-27, 18:09
|
Link #618 | ||
|
Paparazzi
Join Date: Mar 2008
Age: 41
|
Quote:
") Anyway that's not a reason to be discouraged. As Chase Jarvis said, "The best camera is the one that's with you." It's only when you get technical and into post processing when you need to dig deep into the bowels of your wallet. Quote:
I was quite surprised how closely those lights approximated their full scale counterparts. I mean they're really damn close, apart from intensity which is roughly around 1/8 of what low intensity flashes would be. PS. I'll try to get the part 2 of the tut done tomorrow. I need to fix the lightbox I used for the Ferrari miniature, the tape gave out and it sort of exploded.
|
||
|
|
|
|
2012-04-29, 16:15
|
Link #619 |
|
Paparazzi
Join Date: Mar 2008
Age: 41
|
Sorry guys, didn't get the part 2 of the figurine & miniature tutorial done.
Anyway this week's 365 project roundup.  Day 14. 2012/04/23 by J. Savio, on Flickr  Day 15. 2012/04/24 by J. Savio, on Flickr  Day 16. 2012/04/25 by J. Savio, on Flickr  Day 17. 2012/04/26 by J. Savio, on Flickr  Day 18. 2012/04/27 by J. Savio, on Flickr  Day 19. 2012/04/28 by J. Savio, on Flickr 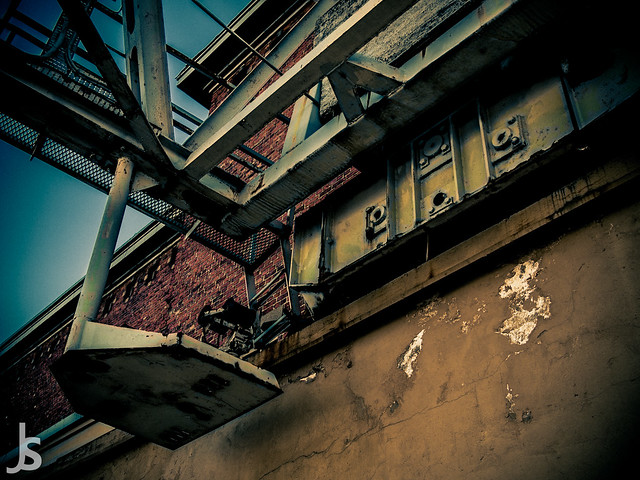 Day 20. 2012/04/29 by J. Savio, on Flickr |
|
|
|
|
2012-05-06, 15:00
|
Link #620 |
|
Paparazzi
Join Date: Mar 2008
Age: 41
|
Another weekly roundup.
 Day 21. 2012/04/30 by J. Savio, on Flickr  Day 22. 2012/05/01 by J. Savio, on Flickr  Day 23. 2012/05/02 by J. Savio, on Flickr 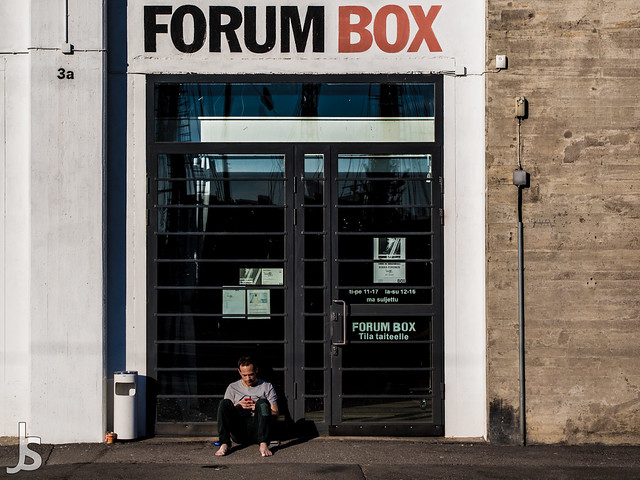 Day 24. 2012/05/03 by J. Savio, on Flickr 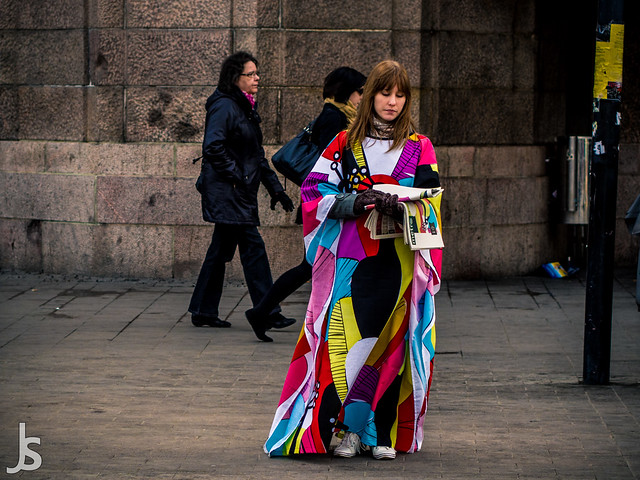 Day 25. 2012/05/04 by J. Savio, on Flickr  Day 26. 2012/05/05 by J. Savio, on Flickr 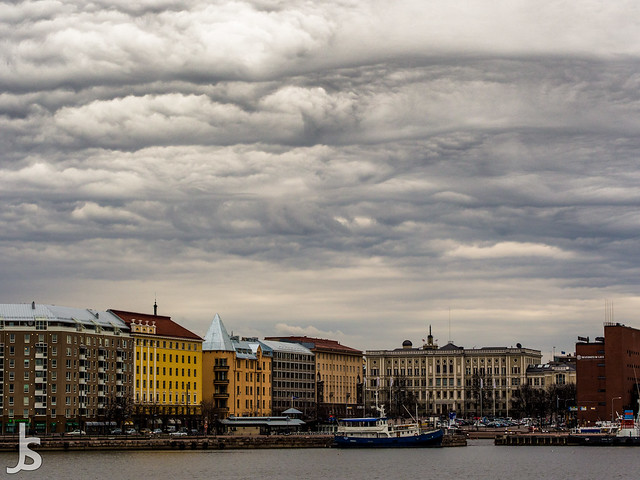 Day 27. 2012/05/06 by J. Savio, on Flickr Okay, a few additions to the gear lineup. Got my Olympus OM-D E-M5 12-50mm kit last Monday. Bought a battery grip with it. Then had a momentary lapse of self control and got a Olympus 45mm F/1.8 as well. A bit of an expensive week. |
|
|
|
 |
|
|


 (I think I did say something about a few annoyances...
 :|::|
:|::|
