2007-01-13, 12:12
|
Link #1 |
|
sleepyhead
 Author AuthorJoin Date: Dec 2005
Location: event horizon
|
Ok this my lil' workshop, everything I create here is totally free.
If you wish for things like site banners or anything else like avatars and sigs that you wont use on AnimeSuki then please post your requests here and not in the lil' stick above. If you post above it will cause confusion and will most likely get ignored. Guidelines for Requests
----------------------------------------------------------------------------------------
Besides mass-posting free stuff from now and then I'll place lil' tutorials that wouldn't fit anywhere else on the forum. ---------------------------------------------------------------------------------------- __________Index__________ ---Graphics--- -: Catgirl Avatars :- -: Catgirl Signatures :- -: Miscelanous Avatars :- -: Akira Kogami Caps :- ---AnimeSiteBuilding--- -: Website Building - Slicing & Dicing :- -: Website Building - Basics of (X)HTML :- -: Website Building - CSS Styling Primer :- -: Website Building - PHP Simple Uses :- Links in the index will open a new tab/window with only that post, use it if you have problems loading them all. -- Open This Post In It's Own Window --
__________________
Last edited by felix; 2007-04-23 at 17:15. Reason: Updates. |

|

|
|
2007-01-13, 12:13
|
Link #2 |
|
sleepyhead
AuthorJoin Date: Dec 2005
Location: event horizon
|
I would love to hear which are peoples favs would help me improve.
Yeah this is my hobby... but there's no harm in getting better :P ---------------------------------------------------------------------------- If anyone wants to save them to their hdd here they are prepacked: Standard .Zip Archive [RapidShare] | Self-Extracting .7z Archive [RapidShare] | Self-Extracting .7z Archive [DataFile] | Self-Extracting .7z Archive [FileCrunch] ----------------------------------------------------------------------------  . .  . .  . .  . .  . .  . .  . .  . .  . .  . .  . .  . .  . .  . .  . .  . .  . .  . .  . .  . .  . .  . .  . .  . .  . .  . .  . .  . .  . .  . .  . .  . .  . .  . .  . .  . .  . .  . .  . .  . .  . .  . .  . .  . .  . .  . .  . .  . .  . .  . .  . .  . .  . .  . .  . .  . .  . .  . .  . .  . .  . .  . .  . .  . .  . .  . .  . .  . .  . .  . .  . .  . .  . .  . .  . .  . .  . .  . .  . .  . .  . .  . .  . .  . .  . .  . . 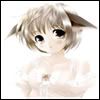 . .  . .  . .  . .  . .  . .  . .  . .  . .  . .  . .  . .  . .  . .  . .  . .  . .  . .  . .  . .  . .  . .  . .  . .  . .  . .  . .  . .  . .  . .  . .  . .  . .  . .  . .  . .  . .  . .  . .  . .  . .  . .  . .  . . . .  . .  . .  . .  . .  . .  . .  . .  . .  . . 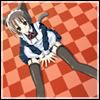 . .  . .  . .  . .  . .  . .  . .  . .  . .  . .  . .  . .  . .  . .  . .  . .  . .  . .  . .  . .  . .  . .  . .  . .  . .  . .  . .  . .  . .  . .  . .  . .  . .  . .  . .  . .  . .  . .  . .  . .  . .  . .  . . 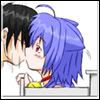 . .  . .  . .  . .  . .  . .  . .  . .  . .  . .  . .  . .  . .  . .  . .  . .  . .  . .  . .  . .  . .  . .  . .  . .  . .  . .  . .  . .  . .  . .  . .  . .  . .  . .  . .  . .  . .  . .  . .  . .  . .  . .  . .  . .  . .  . .  . .  . .  . .  . .  . .  . .  . .  . .  . .  . .  . .  . .  . .  . .  . .  . .  . .  . .  . .  . .  . .  . .  . .  . .  . .  . .  . .  . .  . .  . .  . .   . .  . .  . .  . .  . .  . .  . .  . .  . .  . .  . .  . .  . . 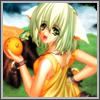 . .  . .  . .  . .  . .  . .  . .  . .  . .  . .  . .  . .  . .  . .  . .  . .  . .  . .  . .  . .  . .  . .  . .  . .  . . 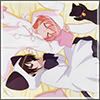 . .  . .  . .  . .  . .  . .  . .  . .  . .  . .  . .  . .  . .  . .  . .  . .  . .  . . 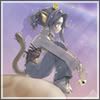 . .  . . . .  . .  . .  . .  . .  . .  . .  . .  . .  . .  . .  . .  . .  . .  . .  . .  . .  . .  . .  . .  . .  . .  . .  . .  . .  . .  . .  . .  . .  . .  . .  . .  . .  . .  . .  . .  . .  . . 
__________________
Last edited by felix; 2007-04-24 at 08:37. |
|
|
|
|
2007-01-13, 14:00
|
Link #7 |
|
sleepyhead
AuthorJoin Date: Dec 2005
Location: event horizon
|
@ saphyre
The avatars took around 3 or so hours to make in total (333 of them were done in 2.5 hours, I know since I remembered the time, when I started, at the time when I finished them). Uploading them on the other hand... well, I'm a fealing a lil' shaky just thinking about it. @ Geta Boshi - Thanks 
__________________
|
|
|
|
|
2007-01-13, 14:42
|
Link #10 |
|
sleepyhead
AuthorJoin Date: Dec 2005
Location: event horizon
|
 ------------------------------------------------------------------ The close up of Sayuri is hard to get and doens't produce exiting results. @ Jinto Lin - How does that work @_@ //adds to notes..
__________________
|
|
|
|
|
2007-01-13, 14:50
|
Link #12 | |
|
~ You're dead ^__^* ~
Graphic DesignerJoin Date: Apr 2006
Location: uk, England
Age: 34
 |
Quote:
 but wow soo many neko mimi O.o you must have a sep folder labled "catgirls" great job ~ but wow soo many neko mimi O.o you must have a sep folder labled "catgirls" great job ~
__________________
|
|
|
|
|
|
2007-01-13, 18:21
|
Link #15 |
|
sleepyhead
AuthorJoin Date: Dec 2005
Location: event horizon
|
Ahh regular expresion that's what you meant by regXp, for a moment there I was going WTF.
Yeah I get it. But I didn't want to place them on a server. Doing that would have been a lot easier to do, but I just didn't want to. Further more I specificly wanted to have them uploaded to photobucket. I like keeping records. If I went that route I would just have to go to notepad and write 2-3 lines of php to generate the stuff. But yeah Deathkillz is right I was a lil' tired when I got to uploading them and didn't notice that photobucket links aren't randomized, hence I could have just generated everything instead of copy/pasting links like crazy >.< That guide is pretty intreting tho @_@ ------ @ Riker - Don't forget the click text instant copy feature
__________________
|
|
|
|
|
2007-01-13, 18:55
|
Link #17 | |
|
ahaha
Join Date: Sep 2006
Location: My room
Age: 34
|
Quote:

|
|
|
|
|
|
2007-01-14, 20:50
|
Link #18 |
|
sleepyhead
AuthorJoin Date: Dec 2005
Location: event horizon
|
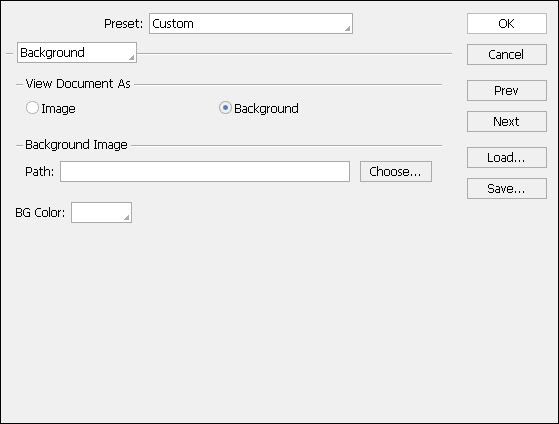
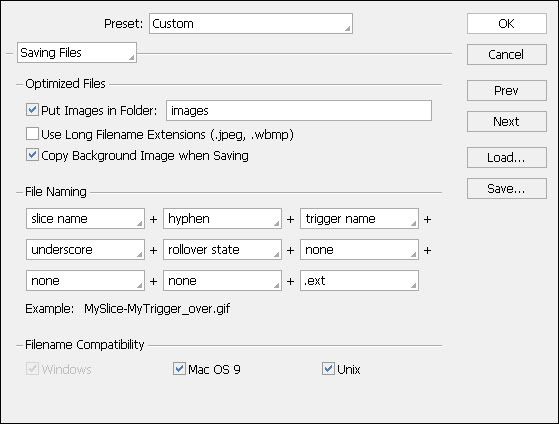
For this tutorial the following programs are needed: Photoshop and ImageReady (which is prepacked with Photoshop)
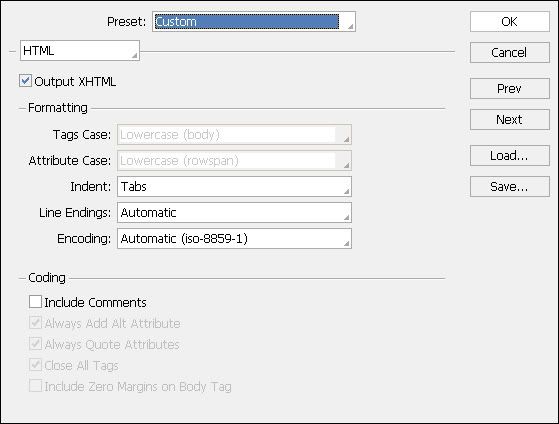
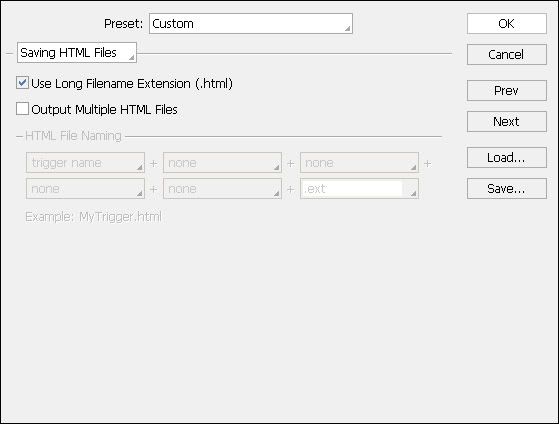
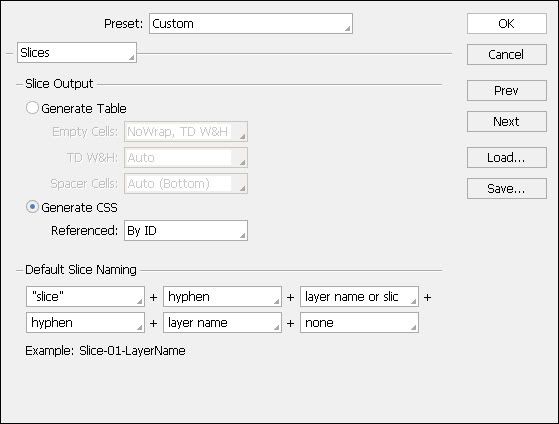
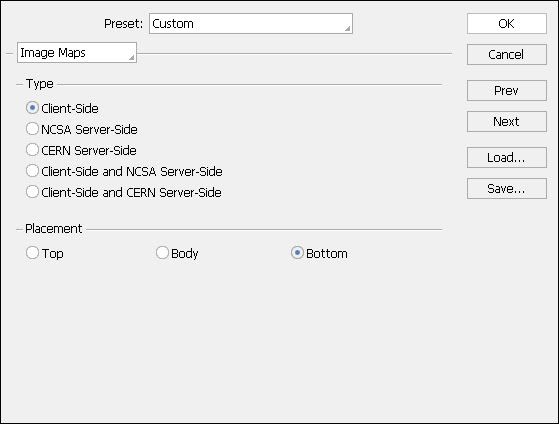
------------------------------------------------------------- Download Link: 7-zip Self Extracting Archive (the result + every other file) ------------------------------------------------------------- Note: I limited the tutorial to slices thus I made the simplest and most pathetic easy to understand site I can make. Pre-Requiered knowledge. Here's what you need to know. First, you should be able to use the mouse. Seccond, you need to be able to draw. No special drawing skills are required, super pathetic level is OK That's it... Extra DetailsBasic Concept. Teh simple explanation... You draw something that looks like a website, and we turn it into a website. No the site won't be a picture, links and text content, roll-overs are discussed. Tutorial DetailsThe Fundamental n00by Problem. Everyone suffers this... at some point... Basically you try to make a site, lets say your making one of those personal sites home page things. You want to make a nice site, but well there's no content you try to write it but lets face it it's awkward for some pages and hard to write. TipsSlicing. Back to business. Quick Note Just in case... If you want to apply as you read, first go into your favorite graphics editor and draw something that looks like a site. Otherwise if you want to follow with me here are the RAW files. (I did a little work but it basically what's going to be covered) The site I used as an example is complete simplicity. It's structure is a follows: Home, About, Gallery (flash gallery to be exact), Links, Diary. No, you do not need to have Adobe Flash, we are going to make the entire flash gallery using only Adobe Photoshop. Concept Simple stuff simpler. We take it (our template) mark the basic elements, then save it. Ok it's a little more work then it sounds :P To get either open :Prime-PS-File in and open it in ImageReady. Or save your drawing of the site and open it in ImageReady.
Final Notes And that's how you make a site in 60s with 0 coding knowledge. (it's 60s only because of the time eating gallery creation I tell you :P ) The problem is... well just look at the content, all unformatted disorganized and all. Tsk tsk not good. Read the tutorial about CSS (coming soon) to get into the simple world of CSS and be able do something about it.
__________________
Last edited by felix; 2007-01-15 at 11:41. Reason: Typo |
|
|
|
|
2007-01-15, 11:40
|
Link #19 |
|
sleepyhead
AuthorJoin Date: Dec 2005
Location: event horizon
|
Purpose
Bla bla bla time... First, I'll start by mentioning that WebPages (in the beginning) weren't more then simple text documents. Basically WebPages were just a sneaky way to communicate articles to other people. This lasted for a while, until enthusiasts started making them just for fun. And so the modern over-pimped-out barely accessible webpage was born. (X)HTML and CSS What does what... Using (X)HTML and CSS you can make nice WebPages with nice graphics. Basically the (X)HTML with CSS is like graffiti on a wall, where (X)HTML is the wall and CSS is the graffiti. In other words all you can make with (X)HTML is plain somewhat boring wall, but without (X)HTML you wouldn't have anything to put the graffiti on.  Concept Some more bla bla bla... The basic concept is still that it's suppose to be like a text document. However the HTML page is a lot more primitive then a text document. Ok I won't go into how text documents work to explain this things here, just know that the basic difference in concept is that you have to clearly mark things you want in a certain way. For example I want to point out in my document that a word is emphasized I have to cleary mark it as such by placing it in-between an <em> ... </em> tag. BTW em comes from Emphesize, all the html marking tags are abbreviation of an word, keep that in mind it will help a lot. Syntax All you need to know... Tags are the things in-between the lour then sign ("<") and greater then sign (">") e.g. <tagname> Tag attributes are placed in the tags and define the property for that particular tag e.g. <tag attribute_name="propriety for this attribute go in here"> Ok, here we go, there are 3 types of tags.
That about covers syntax, you can test it by opening notepad, type in the code, save it as something.html and then opening it in your browser to check the results. In this tutorial I omitted the tags that are dependent on other knowledge like <div> ... </div> or <span> ... </span> who are CSS dependant or the <form> ... </form> which is PHP dependant etcetera (I will discuss them when the time comes) Other tags that were omitted are those that have been deemed obsolete/deprecated/annoying/useless etcetera. ------------------------- Basic Webpage Structure The non-critical stuff... The code will run perfectly without this but it don't hurt and it's standard stuff to do. So... Place all your content in the <body> ... </body> and use all the tags above only in the <body> ... </body> tag. (you don't need more then one body tag) Like the files on your computer html files have metadata. Before the body tag insert an <head> ... </head> (read this as Header ), all the metadata will be inserted in there.Note - What's metadata?! For example, for the files on your computer metadata is stuff like what's the file called, how big it is, when it was created when it was modified etcetera. Same goes for html files. To finish it off lets clearly define that the content is html so place a <html> ... </html>, "html" as in HyperText Markup Language (the name of the code above) Metadata Tags All are writen in the head section... Quick F.A.Q. Q. How do I tell search engines what to say when they list me.
__________________
|
|
|
|
|
2007-01-15, 15:36
|
Link #20 |
|
Ha ha ha ha ha...
Graphic DesignerJoin Date: Apr 2006
Location: Right behind you.
Age: 35
|
Holy Mary, mother of God--- that is a whole lot of neko avatars... Geez, it would take me hours to really look at every single one... That's in insane number.
Anyhow, for the most part I think they are all well done. My only problem is the sigs. They seem a bit... bland. I'm not much for the grey color scheme in the backgrounds.
__________________
|
|
|
|
 |
|
|


 .
.  .
.  .
.  .
.  .
.  .
.  .
.  .
.  .
.  .
.  .
.  .
.  .
.  .
.  .
.  .
.  .
.  .
.  .
.  .
.  .
.  .
.  .
.  .
.  .
.