2008-11-25, 18:30
|
Link #1164 | |
|
Peek a boo
 Graphic Designer Graphic DesignerJoin Date: Dec 2005
|
Quote:
 That setting tends to make the gif look like crap. Try using "Perpectual", "Selective" or "Adaptive" and see if it makes any difference. |
|

|

|
|
2008-11-29, 05:18
|
Link #1167 | |
|
~Nanchatte Renai
ScanlatorJoin Date: Mar 2006
Location: Australia
Age: 30
|
Quote:
 (I'd help rendering when I'm free, I'm stacked with assignments and sig/avie requests at the moment, when I'm free I can try then.)
__________________
|
|
|
|
|
|
2008-11-29, 11:32
|
Link #1168 |
|
Silent Writer
Graphic DesignerJoin Date: Sep 2008
Location: The Other Realm
Age: 33
 |
yeah, i have read some tutorials on how to render and it really turns out bad. so im asking someone who can render some images from time to time for me, but i will practice more so i won't need to ask everyone to render things for me.
(i hope your free, just leave me a comment at my profile if your free i could really need some renders. thanks for the offer.)
__________________
|
|
|
|
|
2008-12-12, 02:18
|
Link #1177 | |
|
Fanfic Writer
ArtistJoin Date: Dec 2008
Location: At Eitoku Gakuen
Age: 36
|
Quote:
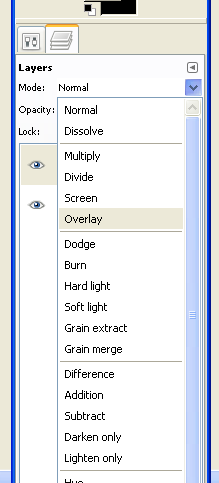
If there is already a post about the GIMP one, please tell me so I can delete this post. Anyway, here is how I usually do mine: Step One: Copy and paste an image onto a GIMP. If it is a big image, and you only want part of it, use the rectangle selection tool to select the part of the image that you desire. Here is the image that I am going to use for this this tutorial: 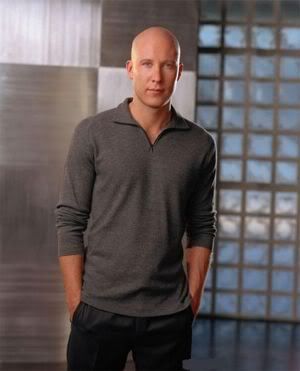 Here is what I selected from the photo and will be working with: 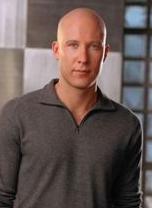 Step Two: Resize the image to the correct settings for the Avatar/Signature requirements. Since I'm doing an avatar, it'll be to the Avatar settings Here's what it looks like:  Step Three: Add a new layer and title it "Border" Keep the settings the same, and don't change anything. Next, go up to Selection and go to "Select All." Make sure the border layer is selected before doing so. Step Four: Set the color to Black, then go to edit and go down to Stroke Selection... Set the Line width to 10 pixels. Then, Set the color to White. This time, set the stroke selection to 8 pixels. It should leave a thick white border around your picture. Lastly, Set the color back to Black. Then, Set the Stroke Selection to either 5 or 6, whichever one you prefer. Step Five: After creating the border, set the layer mode to Overlay Here is where it is located: Spoiler for ScreenShot:
Here is what it should look like: 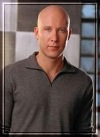 Hope you had fun! It gets really easy after you start making a bunch of Avatars/Signatures. |
|
|
|
|
|
2008-12-12, 02:53
|
Link #1178 |
|
Kira_Naruto, the ecchi
Graphic DesignerJoin Date: Dec 2005
Location: http://www.exciting-tits.com/
|
A little tip for those using Sephi's excellent pen extraction here.
Have you ever encounter the problem that your vector mask became inverted? As in, it removed the render and leaves you with the BG instead? Annoying isn't it? Redo? it would be fine if its a small render, but what if itsa a huge render? Well, heres what you do.. Step 1. Select path selection tool. Its right above the pentool (PS CS2) next to text tool. Step 2. Look at the option at top. Its right under the file - edit -image - etc etc. 99% chances are, it is set to subtract from area, so set it back to the 1st option add to shape area and recreate your vector mask. 
__________________
|
|
|
|
|
2008-12-12, 03:04
|
Link #1179 | |
|
Black Dragon
Graphic DesignerJoin Date: Dec 2007
Location: In the Netherrealm, thinking who to betray next...
|
Quote:
This is my outcome  Oh, and yeah, "cookies" PD: You should better use this Lex Luthor  
__________________
|
|
|
|
|
|
2008-12-12, 03:34
|
Link #1180 | |
|
Fanfic Writer
ArtistJoin Date: Dec 2008
Location: At Eitoku Gakuen
Age: 36
|
Quote:
I like the Michael Rosenbaum Lex Luthor better...
|
|
|
|
|
 |
| Tags |
| avatar, graphic, photoshop, signature |
|
|


 <-- This tab