2011-05-17, 11:17
|
Link #1602 |
|
Senior Member
Join Date: Oct 2008
Location: Finland
Age: 33
 |
Huh ? You're gonna have to do better than that. Just look at the pictures. First we have Miku there and selected area, and then suddenly there's a black block over her. No explanation whatsoever how did it happen. And how do I turn snap on ? <.<
__________________
|

|

|
|
2011-05-18, 09:57
|
Link #1603 |
|
Kira_Naruto, the ecchi
 Graphic Designer Graphic DesignerJoin Date: Dec 2005
Location: http://www.exciting-tits.com/
|
Thats your mistake.. its not the selection tool (the one where you get the marching ant).. its the shape tool
 And since you've asked, you can turn on the snap option in view -> snap to -> something something ( I dont have photoshop right now)
__________________
|
|
|
|
|
2011-05-18, 17:34
|
Link #1604 |
|
Senior Member
Join Date: Oct 2008
Location: Finland
Age: 33
|
Here, have a picture since none of you seem to believe me. What do you call that tool if not the shape tool ? It definitely isn't the selection tool.
Spoiler for pic:
And I don't still get where the extra layer comes from, because when I select that area, absolutely nothing happens. And by the way, the snap is turned ON but it does not snap when using the shape tool. My photshop skills are the basics of the VERY basics, and I probably can't even cover the basics. I only use it to make animated GIF's and I know how that works but anything more advanced .. That's why, I would appreciate more detailed explanation regarding the tut that mikoo posted because it's obviously not working with just what the info I was given.
__________________
|
|
|
|
|
2011-05-19, 05:48
|
Link #1606 |
|
Senior Member
Join Date: Oct 2008
Location: Finland
Age: 33
|
You still don't get it. When I click the shape tool and draw my shape, if I have paths selected like tutorials say I have to, absolutely effing NOTHING happens when I draw it, other than I see the lines for the shape. If I don't select paths, then yes, the image is covered in black, but NO new layer is made so I STILL don't get where that second layer with the mask suddenly comes from. And the snap STILL doesn't work so making rounded rectangle is nearly impossible if I want it to be symmetrical and stuff.
Just look at the image I already posted above -_-
__________________
|
|
|
|
|
2011-05-19, 06:39
|
Link #1607 |
|
♪~ Daydreaming ~♪
Graphic Designer Administrator AdministratorJoin Date: Dec 2005
Location: Italy
|
Let's try with a different method. Do you have ImageReady? Because I basically use only that. My version is 9.0 CS2.
I'm starting with the following image and I want to do an avatar with rounded borders of Madoka in the bottom. Spoiler for tidiness:
1) In ImageReady, load your pic and crop a square, then resize it to 100x100 (this is the standard procedure for an avatar) Spoiler for saving space:
2) Select the Rounded Rectangle Marque Tool Spoiler:
3) Put the mouse cursor on one of the corners of the image (let's say top left) and drag it into the opposite direction (let's say bottom right). Now you should have this: Spoiler for saving space:
4) Menu: Select --> Inverse Spoiler:
5) Menu: Edit --> Clear (or the "Canc" button). At this point of time you should have this: Spoiler for saving space:
6) Menu: Select --> Inverse (yes, again) 7a) At this point it's time to stroke it. Menu: Edit --> Stroke --> Background Colour (White) 3 px. 8a) Then again, Menu: Edit --> Stroke --> Foreground Colour (your choice, black for generic avatars, or a colour of choice, or the protagonist's hairs like I've done here) --> 1 px. [[ 7b) Alternative. This step can be done instead of 7a and 8a in case you want a simple 1 px black border. The procedure is even simpler. Menu: Edit --> Stroke --> Foreground Colour --> 1 px (black). ]] 9) Save optimized as... (as you wish). The final result: 
__________________
|
|
|
|
|
2011-05-19, 06:50
|
Link #1608 |
|
Senior Member
Join Date: Oct 2008
Location: Finland
Age: 33
|
I use Photoshop CS5 so the Imageready is built-in I think ? Anyhow .. There's no rounded rectangle marque tool. There's only rectangle and elliptical marque tool. Then there's the shape tools but as I've described earlier, they don't work the way they should for whatever reason. Using the elliptical marque tool I was able to make a circle shaped avatar using your tutorial so thanks for that. The rounded avatar problem still remains, though.
And the another problem .. that is, why snap doesn't work. It didn't work with the elliptical tool either, only the normal rectangle tool.
__________________
|
|
|
|
|
2011-05-19, 08:57
|
Link #1609 |
|
Strangely dependable...
Join Date: Nov 2006
Location: some random place out there...
|
Looking at the pic you captured of your desktop, I notice that you don't have the "create new shape layer" clicked (actually that button option isn't even there in your toolbar). You have the "exclude overlapping shape areas" option selected. You need to select the "create new shape layer" for the shapes to be created as a new layer each time.
There should be 5 buttons to the right of the "Radius" menu option on your toolbar. The "create new shape layer" button should be part of those 5 buttons. It should appear when you select the "shape layers" option (right now you have the "paths" option selected).
__________________
|
|
|
|
|
2011-05-19, 10:00
|
Link #1610 |
|
Senior Member
Join Date: Oct 2008
Location: Finland
Age: 33
|
All the tutorials I found on the index though, claim that I have to select '' paths '' which is what I have selected. It's not called exclude overlapping shaping areas. The icon next to it, however, is called Shape Layers and appears to be working like it does in the tutorial. I will try it in a moment.
However, that still leaves the problem of the snap feature not working with the shapes so I can't make a shape with constrained proportions. The tutorial Pellissier posted seems easier though, but for some reason like I said, I do not have such tool as Rounded Rectangle Marque tool.
__________________
|
|
|
|
|
2011-05-19, 11:14
|
Link #1612 | |
|
Strangely dependable...
Join Date: Nov 2006
Location: some random place out there...
|
Quote:
Anyway, the "paths" and "Shape layers" buttons are grouped on the left (which you already know). The "Exclude overlapping shape areas" and "create new shape layers" buttons are located on the far right (in your pic you posted, these buttons would be located to the right of the "Radius" menu - all on the same tool bar. I'll get a printscreen up later if it is still needed. Don't have time right now. As for snap - you can try holding <shift> down while drawing your shape out with your mouse. The proportions should be maintained (if I understand you correctly on this point).
__________________
|
|
|
|
|
|
2011-05-19, 20:22
|
Link #1613 |
|
Senior Member
Join Date: Oct 2008
Location: Finland
Age: 33
|
Well that took a lot of effort <.<. All because the tuts I had read were talking about how paths must always be enabled, and then on mikoo's tutorial there was no step explaining how I should have selected the Shape Layers.
Ugh. Well, it's all working now so sorry about the trouble and thanks as well. Rep given to who I could.
__________________
|
|
|
|
|
2011-05-25, 01:43
|
Link #1614 |
|
Call me MK! :)
Graphic DesignerJoin Date: Oct 2009
Location: The top of the world.
Age: 34
|
Recently I got a new photoshop cs5.
Spoiler for screenshots:
Now when I try to use new brushes (which I downloaded later on) photoshop refuses to use them. Now I can use the brushes that are already in photoshot but I can't add new ones. I used this brush (from deviant art), but when I try to use it it shows this....  The file of downloaded brush is 'ABR'  Is there some special/different way on how to use brushes in photoshop cs5? On my previous photoshop cs4 I simple moved brush file from my folder on descopt directly on photoshop. But now that doesn't work. Do I need to upload brushes on Pcs5 differently? Thanks in advance ~ MK
__________________
|
|
|
|
|
2011-05-25, 10:48
|
Link #1615 | |
|
♪ ~ ♫
ArtistJoin Date: May 2008
Location: Europe
Age: 35
 |
Quote:
Code:
C:\Program Files (x86)\Adobe Photoshop CS5\Presets\Brushes
C:\Program Files\Adobe Photoshop CS5 (64 bit)\Presets\Brushes
__________________
|
|
|
|
|
|
2011-05-27, 15:46
|
Link #1617 |
|
「Darkly Charismatic 」
ArtistJoin Date: May 2008
Location: The Lounge
|
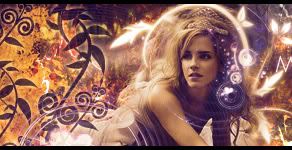
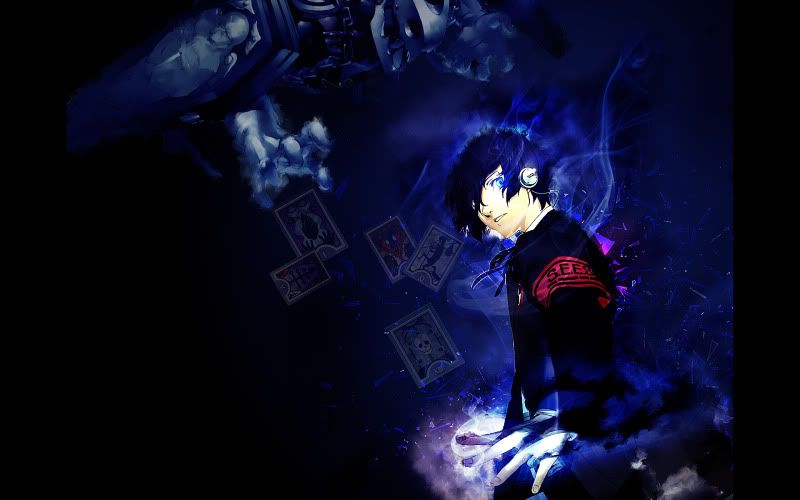
So, I loosely followed a tut Illusore gave me a while ago and I ended up with this:
Spoiler for Big:
Not really a sig, but a wallpaper. Just sharing!  *Edit* Making sure no-one misunderstands again, I re-sized it to fit these boards (decreasing load time, original size is 1920x1200)
__________________
Last edited by Kaze; 2011-05-27 at 18:17. |
|
|
|
|
2011-05-27, 17:09
|
Link #1619 |
|
Senior Member
Join Date: Oct 2008
Location: Finland
Age: 33
|
Why do people even bother making 800x600 wallies at this time of age and day? Yeah sure, there may be people who still want to use so small wallies, but if you made it at 3x size of that, so 2400x1800, others could use it too who want larger resolution. If all of the work is done on computer I don't get why would you do it in small resolution to begin with >.<
Good work Kaze though. No offense intended with what I wrote above.
__________________
|
|
|
|
 |
| Tags |
| avatar, graphic, photoshop, signature |
|
|


 :|::|
:|::|