 2006-05-23, 20:02
|
Link #141 | ||
|
I am mowing clowns
Join Date: Dec 2005
|
Quote:
 Quote:
|
||

|

|
|
2006-05-28, 01:32
|
Link #142 |
|
AniMexican!
Join Date: Dec 2005
Location: Monterrey N.L. Mexico
|
Today I made the jump from Photoshop 6.0 to Photoshop CS, and I am wondering if anyone could help me with the following:
 When I am working on a layer and try to add a new element to it, I notice that it gets Glued to any of the borders the moment I move it near them. This is extremely troublesome when I want to have that element near the edge and not next to it (see pic above)  I also noticed a blue line that appears on the borders whenever the "Magnetic Effect" kicks in. With that in mind, I would like to know how to turn off that option, setting or whatever it is. Sorry if this is a dumb question or if I am not very clear with the problem at hand. I am not very good with technobabble. 
__________________
|
|
|
|
|
2006-05-28, 01:46
|
Link #143 |
|
Kira_Naruto, the ecchi
 Graphic Designer Graphic DesignerJoin Date: Dec 2005
Location: http://www.exciting-tits.com/
|
I dont really stumble in that particular problem but shouldn't you be able to use nudge? ... Just use arrow keys to move it a bit(1 px per nudge) ... Ctrl + arrows move around 20 px per nudge ..(or is it alt + arrow) .. Its just workaround.. not a real solution tho
 Make sure press v for the move tool before nudging ^__^
__________________
|
|
|
|
|
2006-05-28, 02:03
|
Link #144 | |
|
AniMexican!
Join Date: Dec 2005
Location: Monterrey N.L. Mexico
|
Quote:
 Using the arrow keys was exactly the type of quick solution I was hoping to find. The evil magnetic effect is still there, but at least now I can get around it.
__________________
|
|
|
|
|
|
2006-06-16, 01:21
|
Link #145 |
|
Senior Member
Join Date: Feb 2006
Location: Blah
Age: 40
|
Can anyone help me with resizing. I can't seem to resize GIFs 100x100 without them getting stretched and weird looking.
Example.  100x75 It looks fine. 100x75 It looks fine.But when I go to put it at 100x100 is turns into this.  It stretches! |
|
|
|
|
2006-06-16, 01:50
|
Link #146 |
|
Kira_Naruto, the ecchi
Graphic DesignerJoin Date: Dec 2005
Location: http://www.exciting-tits.com/
|
That not strecthing.. thats shrinking
Ok .. I'm going by my memory here .. no PS or IR right now ...  The tool that u need first is not image ->resize, but image->crop .. You need to select with marquee tool first so you get a perfect square .. Press shift while selecting the area you want ... you should get a 75 x 75 square .. now make sure that the part you want (you can move the area selection around), go to image -> crop .. You get a nice square of 75 x 75 gif ... Then go to image -> image size, ensure that constrain proportion checkbox is checked (most importantly) .. then put in a 100 in either the width or height .. it shouldnt matter since when u put a value, the other while resize to correct proportion size.. in our square gif, it should be a 100 as well .. Sorry i couldnt make a screenshot explaining these step .. but try and see if you can follow it ^^
__________________
|
|
|
|
|
2006-06-16, 03:42
|
Link #147 | |
|
Q(°.°Q)
Join Date: Apr 2006
|
Quote:
|
|
|
|
|
|
2006-06-16, 23:18
|
Link #150 | |
|
Senior Member
Join Date: Feb 2006
Location: Blah
Age: 40
|
Quote:
Thanks a ton.
|
|
|
|
|
|
2006-06-18, 02:39
|
Link #152 |
|
sleepyhead
AuthorJoin Date: Dec 2005
Location: event horizon
|
Use one of the selection tools (Lasso Tool, Magnetic Lasso Tool, Rectangular Marquee Tool and so on)... then... either Layer Via Copy or just add a Layer Mask (recommended... since you can easily go back and correct something)Well... there are tutorials here just about this...For example... Pen Tool Tutorial © Dragonwingz
__________________
|
|
|
|
|
2006-06-22, 21:45
|
Link #153 |
|
LOVELY☆COMPLEX
Join Date: Dec 2005
Location: Ontario, Canada
|
try KiNa's tutorial for it, Cyz
http://forums.animesuki.com/showpost...0&postcount=35 i thought it was the easiest and a very good way for doing it ^^V |
|
|
|
|
2006-06-27, 20:07
|
Link #154 |
|
~Nanchatte Renai
ScanlatorJoin Date: Mar 2006
Location: Australia
Age: 30
|
Inner Glow,Outer Glow
HI Peoples I'm going to show newbies and stuff how to do inner glows outer glows all that stuff ok if no one knows what I'm talking about take this sig Riker made
 Okay well that's the Outer Glow part to do this open up any image for example I'm take this image  Now I remove all the background with the magic wand or how ever you want to remove the bg with and then I'll copy the picture and paste it onto a bg that has colour other than white or what ever colour you want so it should look like this now  now go to Layers-Layer Styles-Belnding Options-Outer Glow or Inner Glow Choose what ocapity you want it doesn't matter on what it's on it's what you want And I hope that helped a bit since it wasn't a bit clear how I said it and that well goodluck with it
__________________
Last edited by SweetHoney; 2006-06-28 at 17:25. |
|
|
|
|
2006-06-28, 14:37
|
Link #155 |
|
sleepyhead
AuthorJoin Date: Dec 2005
Location: event horizon
|
When you're making a gif... (avatar, signature whatever...)
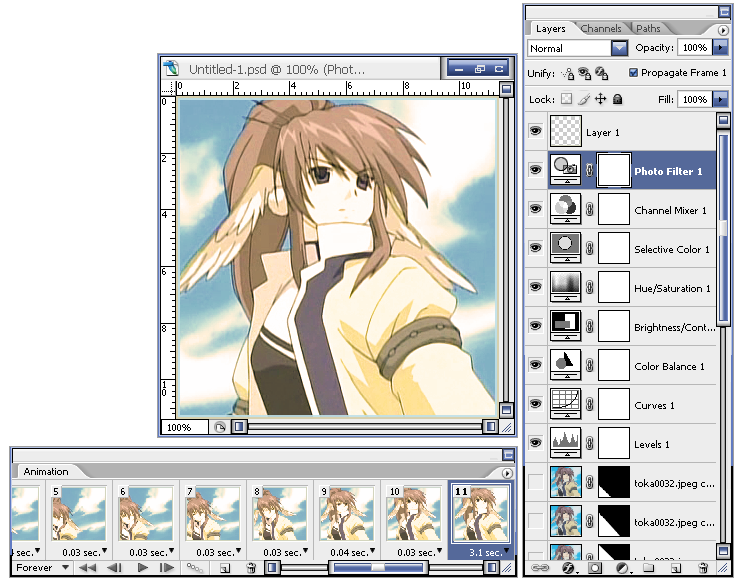
If you want to change something like color balance and so on, to make it a little detached from the anime (more original or if you simply intend to crate a different atmosphere) do your timing and everything in Image Ready(IR) (adding text and stuff should be easier in PhotoShop (PS) so leave it alone) then go to PS... In PhotoShop... Lets start with this... Next... Go to Layer » New Adjustment Layer and select the one you want (if you don't know exactly what they do either test them to see if you get something or just reference Help. Remember to make sure that the adjustment layer is above all the layers. I suggest keeping it bellow the border layer(s) also make sure it's visible in all the frames. You don't really need to check but if you see some layers being effected and others aren't then this should be the problem) Anyway... here's before (left) and after (right) for a clear comparison... 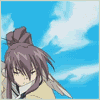  Other things about Photoshop, and newb dilemmas... When you select the font for a new text layer, you can see a preview, useful if you have tons of fonts...*I'm tired... got to go to sleep...*
__________________
Last edited by felix; 2007-02-03 at 08:28. Reason: Reved QC. |
|
|
|
|
2006-06-29, 13:55
|
Link #156 |
|
Follower of Eiyuuou-sama
Join Date: Jun 2006
Location: Singapore
Age: 34
|
thanks for e tutorials! i didnt discover that PS actually had a rounded rectangular tool, and i was unsure of how to use it, until i read e guides Yuiichi wrote. and i learnt about e "stroke" stuff from e shuffle! text tutorial too. didnt know what was stroke all about until now. thanks alot!
actually i have a rather different way of separating a character from e background. maybe u can call it e "noobish way", but i found it to be rather effective... i still hadnt mastered e quick mask method nor e pen tool method. what i did was: 1. duplicate e layer. 2. select e top layer and turn off e "eye" of e bottom layer. 3. use e eraser tool (i prefer using it as a brush, e magic eraser is good for deleting large areas.), to either delete away e character u want separated from e background, or simply delete away e background. (e areas deleted would become transparency.) 4. touch up on side areas using history brush. (like in places where u deleted too much.) 5. turn on e "eye" of e bottom layer, and u get back e original image, though u can now edit e character and e background separately. (like in e case u deleted away e character, e top layer would be where u would apply adjustments and filters to e background, while e bottom layer u can do editing to e character without affecting e background, since only e character is visible with e background layer on top.) 6. use e lock transparency button on e top layer, in this way u will nv fill up e transparent area. i made my current sig using this method (though its not at all impressive, just one of my noobish attempts), but im sharing this method because, maybe other newbies/noobs to PS just like i am can use this method to do image editing, before they finally learn how to use e pro methods of quick masking and pen tool? =) anyway, thanks alot for e tutorials! =D Last edited by jevony; 2006-07-01 at 15:32. |
|
|
|
|
2006-06-30, 13:57
|
Link #157 |
|
sleepyhead
AuthorJoin Date: Dec 2005
Location: event horizon
|
► my personal preference is the Pen Tool… making those curves is a pain… but I have fun doing it… ^___^
P.S. Nice tutorial jevony ^^…
__________________
|
|
|
|
|
2006-06-30, 16:52
|
Link #158 |
|
Follower of Eiyuuou-sama
Join Date: Jun 2006
Location: Singapore
Age: 34
|
heehee! thanks alot! (and nice funny accent! =p) im still learning how to use a pen. seems like fun haha. and im trying to make animated gifs now too! seems complicated on e rounded-edges one though... i wld have to try it out after i make my 1st animated avatar. thanks for e tutorials! ^^
Last edited by jevony; 2006-07-01 at 04:36. |
|
|
|
|
2006-07-01, 06:36
|
Link #160 |
|
Follower of Eiyuuou-sama
Join Date: Jun 2006
Location: Singapore
Age: 34
|
in e previous page, BlackCatXIII has mentioned "http://www.downloadfreefonts.com/fontfiles/afonts.htm"... and i find this site really useful too! i got all my fonts frm dere (except e japanese fonts? =p i used sword kanji.), all very interesting... ^^
i still dont get what happened after i repped BlackCatXIII... i thought i would supposedly use up 1 repution point to rep a person? and i still cant see how many reps dat post has... (like in polls, after u voted, u can see e results right? and now i dont see e results of e rep. =/) ok nvm im just blur. XD oh and i like BlackCatXIII's avatar lots too... very dynamic, lively... nice timings! =) Last edited by jevony; 2006-07-01 at 15:33. |
|
|
|
 |
| Tags |
| avatar, graphic, photoshop, signature |
|
|


 lol…
lol… pro smarts stuff suk…
 I R chouse teh fun method over teh allay but boringnish old war-horse method any day…
 boring e self to hell with some doltish 31337 method never helps thy get better 1337n00b…